Hatch Embroidery
Introduction
The articles series on Hatch Embroidery explains how to digitize embroidery designs from image files, i.e. both vector graphics (SVG, AI, CDR) and high quality raster files (PNG, JPG). This strategy is known as automatic digitization. Our texts target people with some Fab lab or multimedia experience.
Hatch Embroidery 3 is software made by Wilcom, a leading embroidery software company. It is aimed both at a non-professional and a semi-professional audience.
Some documentation was made for version 2. Version 3 adds functionality, but the interface and operations are very similar, so please bear with some Hatch 2 screenshots.
See as well:
- Stitch Era - Semi-professional software for a similar price that includes a drawing module plus a bit more control
- InkStitch - Free embroidery platform that provides all basic functionality.
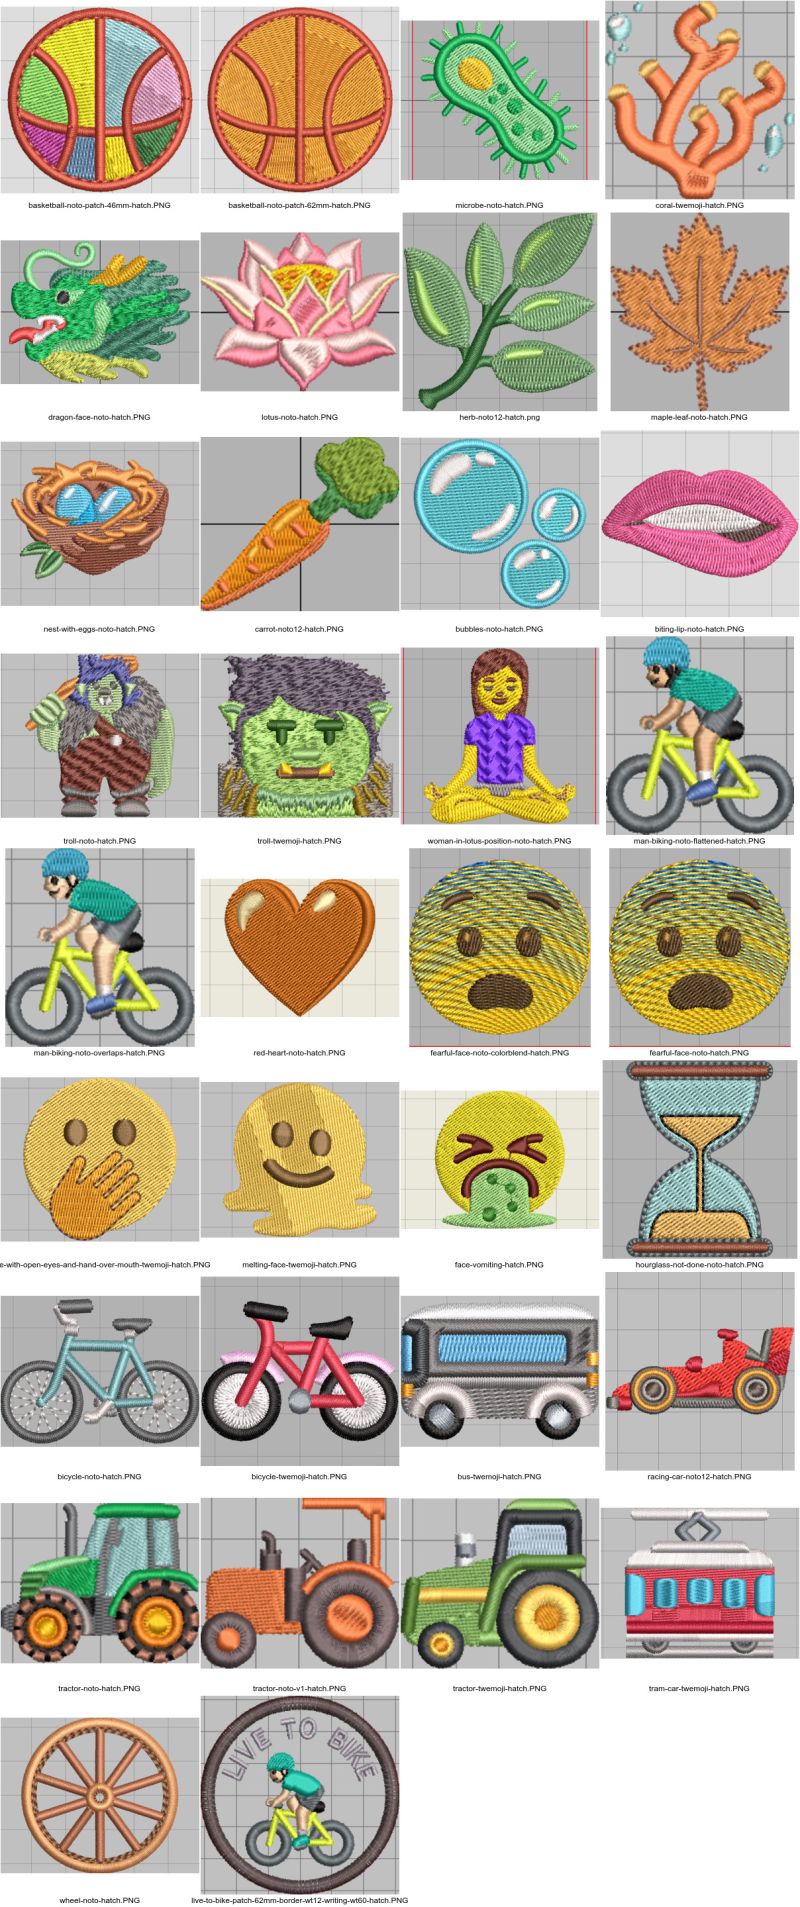
Below are some examples of Emoji characters digitized with Hatch 2. Most are discussed in the various articles on digitizing, setting up and editing embroidery objects. All emoji scans are indexed in List of embroidery emojis (right column). In the folders they are found with "hatch" in the file name.
Prerequisites
If you are new to embroidery, it is strongly advised to browse the following articles before tackling this tutorial. In any case, you should read machine embroidery because we introduce the concept "embroidery object" which defines the elements to be embroidered in a design file.
- Computerized embroidery (compulsory reading for novices)
- Concepts of computerized embroidery (recommended reading)
- Embroidery stitch type (recommended reading)
In addition, it is advisable to install InkScape (drawing software) and learn some basics, for example read the tutorials. Alternatively, you could buy the CorelDRAW GEM for Hatch Embroidery add-on.
Hatch Embroidery 3 Software Variants
The software is sold in four tiers:
- Organizer (~€150)
- Personalize (~250 €), includes lettering
- Compose (~500 €), includes the possibility of arranging objects
- Digitizer (~1000€), includes automatic and semi-automatic (click-to-stitch) digitizing from raster images and classic digitizing
Only the "Digitizer" level is interesting for people wishing to create their own patterns. We do not recommend the purchase of others.
It can be purchased online, directly from hatch. Prices vary depending on the country (VAT) and times of the year (there are actions).
Extensions
There are extensions, called "GEMs".
- For Hatch 3 we recommend the purchase of the Corel Draw extension which allows you to manipulate and digitize vector drawings. (~ €250).
- You can also add Cross Stitch GEM for Hatch Embroidery (~ €90).
Alternatively, additional fonts can also be purchased
Tutorials
At the moment, we offer the following tutorials (all in advanced draft as of August 2022). They explain (1) how to transform a clean design or vector graphics into embroidery objects (2) how to adapt these objects by modifying their embroidery parameters and (3) how to modify the shape of an object.
- Hatch Embroidery 3 - auto-digitizing
- Hatch Embroidery 3 - parametrize embroidery objects
- Hatch Embroidery 3 - edit embroidery objects
- CorelDRAW GEM for Hatch Embroidery
The examples used in this article are available in clipart format *.SVG and *.PNG, as well as the design file *.EMB and an embroidery file *.PES. See List of embroidery emojis (EduTechWiki), the "digitized for hatch" column plus the links inserted in the articles.
Unless otherwise specified, examples have not been tested.
Features of Hatch Embroidery
Hatch, like all good embroidery software, offers several digitizing methods:
- The automatic digitization of a raster image: We transform an entire image into embroidery objects (according to a few options and choices to be made). Read the tutorial Hatch Embroidery 3 - auto-digitizing
- Semi-automatic digitization from a raster image: A color zone of a raster image is transformed into an embroidery object. Also read the tutorial Hatch Embroidery 3 - auto-digitizing
- Automatic or semi-automatic digitization of vector images (precise drawings, e.g. in SVG format) are digitized (for more flexibility and better results, this needs the CorelDraw add-on)
- The classic manual digitization: We draw directly draw embroidery objects
- The photo-stitch allows you to digitize a photo.
- The lettering allows to create texts from pre-digitized fonts
- Monograms work on the same principle as lettering
The embroidery objects can then be re-parameterized and edited. Read the tutorial Hatch Embroidery 3 - parametrize embroidery objects
An embroidery object can be edited, you can change its shape (Reshape), smooth it, change the lines of direction, etc. Read the tutorial Hatch Embroidery 3 - edit embroidery objects
Summary of automatic and semi-automatic digitizing workflow
To digitize an image automatically and semi-automatically there are two options, with the following steps:
(1) Digitize bitmap images (preferably created from vector images)
- In InkScape (or other drawing software): import or create a vector drawing (SVG etc.), then export a clean, high-definition *.PNG raster file. Alternatively, the CorelDRAW GEM for Hatch Embroidery addon adds a bridge to Corel Draw that allows importing a vector drawing.
- In Hatch, create a new blank file (alternatively one can also add a pattern to a design file that already exists)
- Import the raster drawing (preferably *.PNG). Adjust the size if necessary.
- Auto-digitize the drawing. Preferably, use the semi-automatic ("click-to-stitch...") method to digitize one range of colors after the other. The result is a sequence of embroidery objects that together define an embroidery design.
- Adjust the result by modifying the embroidery object parameters and possibly the shape of the embroidery objects.
(2) Digitize vector images
- In InkScape (or other drawing software): import or create a vector drawing (SVG etc.), remove unnecessary details etc. If you plan to digitize vector by vector, remove overlaps.
- Make sure that all polygones are closed with no overlapping points or double segments.
- In Hatch, create a new blank file (alternatively one can also add a pattern to a design file that already exists)
- Import the vector drawing (preferably, using the CorelDraw extension).
- Convert the whole drawing in one step or auto-digitize individual vectors.
- Adjust the result by modifying the embroidery object parameters and possibly the shape of the embroidery objects.
Read the tutorial Hatch Embroidery 3 - auto-digitizing which will explain this workflow with an example and the CorelDRAW GEM for Hatch Embroidery tutorial which explains how to digitize vector designs with this extension.
Feature Discussion
Hatch software is relatively easy to learn and it seems to be powerful than PE design, software with similar operation. Hatch 2 contains a good selection of fills and good algorithms for auto-digitizing. The settings available for embroidery objects are probably sufficient for semi-professional use. The online manual is well done, but quite incomplete. However, Wilcom publishes a large number of thematic resources that allow you to go further, e.g. through its blog or https://academy.hatchembroidery.com Hatch Academy (some courses are free).
Hatch 3 initially offers fairly poor support for drawing: limited import of formats, impossible to edit imported vector drawings. This is annoying for graphic designers and multimedia specialists. However, this functionality can be somewhat added by purchasing the extension GEM for Hatch Embroidery. CorelDraw is a good vector editor (some prefer it to Illustrator).
The integration with Hatch 2 didn't work very well it seems. C.f. version of CorelDRAW integrates with Hatch Embroidery 2? ). The same publisher, Wilcom, sells E4, a professional software, which automatically integrates CorelDraw, but it is 4-5x more as expensive than Hatch 🥲.
Compared to professional software like E4.x, or semi-professional like Stitch Era, the embroidery object properties are a bit limited. For example: we cannot add a built-in border to an object (but it is easy to add an outline object with an optional offset), we cannot repeat the sewing of straight stitches on a line (but we can duplicate it), we cannot transform a line into satin in certain cases, we cannot set the ends of the satin lines, the gradients are simplistic, there is no compensation in percentage, setting direction lines is sometimes difficult (to be checked), sometimes strange behavior of the node editor. That said, the software is flexible enough to create professional embroideries.
The lack of good drawing support is not a problem for people who prefer classic digitization, i.e. draw embroidery objects directly. Also, automatic digitizing of clean, high-resolution raster drawings works well. In other words, one can prepare a drawing in a drawing software and then import a clean raster file. Alternatively, CDR, WMF or EPS vector formats can be imported directly and all other formats via the CorelDraw extension. In summary, we can live with this limitation, even if we strongly regret it.
Installation
Language
You can install Hatch in several languages. During the first installation, you have to check all the languages you want. Otherwise, the installation must be corrected. So in Windows:
- Look for Hatch in the uninstaller
- Select "Edit" and respond to the following screens.
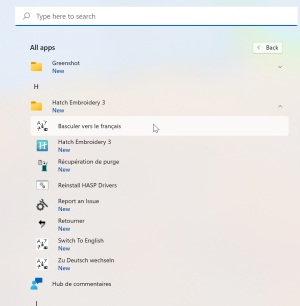
You then must switch language in the Windows start menu (!). Under Windows hit the Windows button or click on the Window in the bottom bar, then select all apps -> Hatch. There are switching scripts for every language you installed (click).
Your machine and your frames
You can define brand and model embroiderer and its frames.
- Software Settings menu -> Embroidery Settings -> Machine & Hoop The list of machines is outdated and mostly frames are missing, but adding a machine or frame is simple:
- Right-click on "hoop" (frame?)
- Then either
Create...for the machine or the frame.
You can calibrate the filling of holes (0mm by default) and the elimination of overlaps (1mm by default).
- Software Settings menu -> Embroidery Settings -> Overlap
Thread support
Hatch has defined a wide range of yarns. By default, Hatch searches for a random yarn that matches the RGB values in your design.
We can limit to a single palette (Gunold Poly 40 most of the time in our case). Matching is excellent.
There is no support for thread weight. I.e. all default parameters as well as visualization is for w.t. 40 thread.
Hatch 3 with respect to Hatch 2
Hatch 3 was released on June 1, 2022. The digitizer level brings some nice improvements with respect to Hatch 2. That being said, the interface and the global functionality remain the same.
- A new type of PhotoStitch ("Reef")
- Improved "normal" PhotoStitch
- Import embroidery designs with a touch
- "Laydown stitch", allows you to flatten irregular fabrics such as towels
- A command to center at 0.0 (about time)
- "Hand Stitch", a filling simulating manual embroidery
- Auto-digitizing: Improvements to reduce colors, segment shapes, sequencing and paths, editing vector artwork
- Close shapes
- Improved sequences panel
- Improved lettering (min and max size poster for example)
- Improved multi-position hooping
- Improved frame and machine management
- 64bit support (so performance improvement)
- Better support for PES (don't know what)
Upgrade price: $200
Links
- Software @ Hatch
- Product documentation for Hatch 3
- https://hatchembroidery.com/ (main web site)
Tutorials in french (originals)
- Hatch Embroidery 3 (EduTechWiki)

