Hatch Embroidery 3 - auto-digitizing
This article or section is currently under construction
In principle, someone is working on it and there should be a better version in a not so distant future.
If you want to modify this page, please discuss it with the person working on it (see the "history")
Intro
This tutorial explains how to digitize a clean and sharp raster image (PNG, JPG, GIF, etc.) with the Hatch Embroidery embroidery software (versions 2 and 3). Under clean and sharp image we mean: High resolution image, few colors, clean borders. So especially not a photo! We will first explain how to prepare a quality PNG file with InkScape, then we introduce automatic digitizing, then semi-automatic digitizing. The latter is our preferred procedure and also works well with imported vector graphics (available through CorelDRAW GEM for Hatch Embroidery).
Most of the examples were done with Hatch 2. There is very little difference with Hatch 3 when it comes to automatic raster image digitizing.
We will also use a little Inkscape, the best free drawing software. If you decide not to buy Hatch after the trial period you can then learn how to use InkStitch, free extensions for embroidery.
Preparing a matrix file for Hatch
Since Hatch Embroidery 2 and 3 import neither standard vector files (SVG) nor Illustrator (AI), and it transforms an imported vector file anyway (formats *.WMF, *.CDR, *.EPS ) in raster, it is advisable to prepare a high resolution *.PNG file from a vector drawing. Unless you are already an expert in Illustrator or Corel Draw, we recommend using the free drawing software InkScape.
Otherwise, if you start from a raster drawing (*.PNG, *.JPG, *.GIF, etc.) you must ensure that the drawing is clean. It is possible to vectorize it with drawing software, clean it and then re-export it in *.PNG. For example, if you want to digitize a handmade drawing, you can follow the first part of the procedure explained in InkStitch - stitch files from hand drawings, i.e. color reduction plus vectorization . You can also try to digitize it directly with Hatch using color reduction. It may or may not work....
Choose a good resolution
In this section we show how to transform a drawing in SVG format into a raster file with the software InkScape.
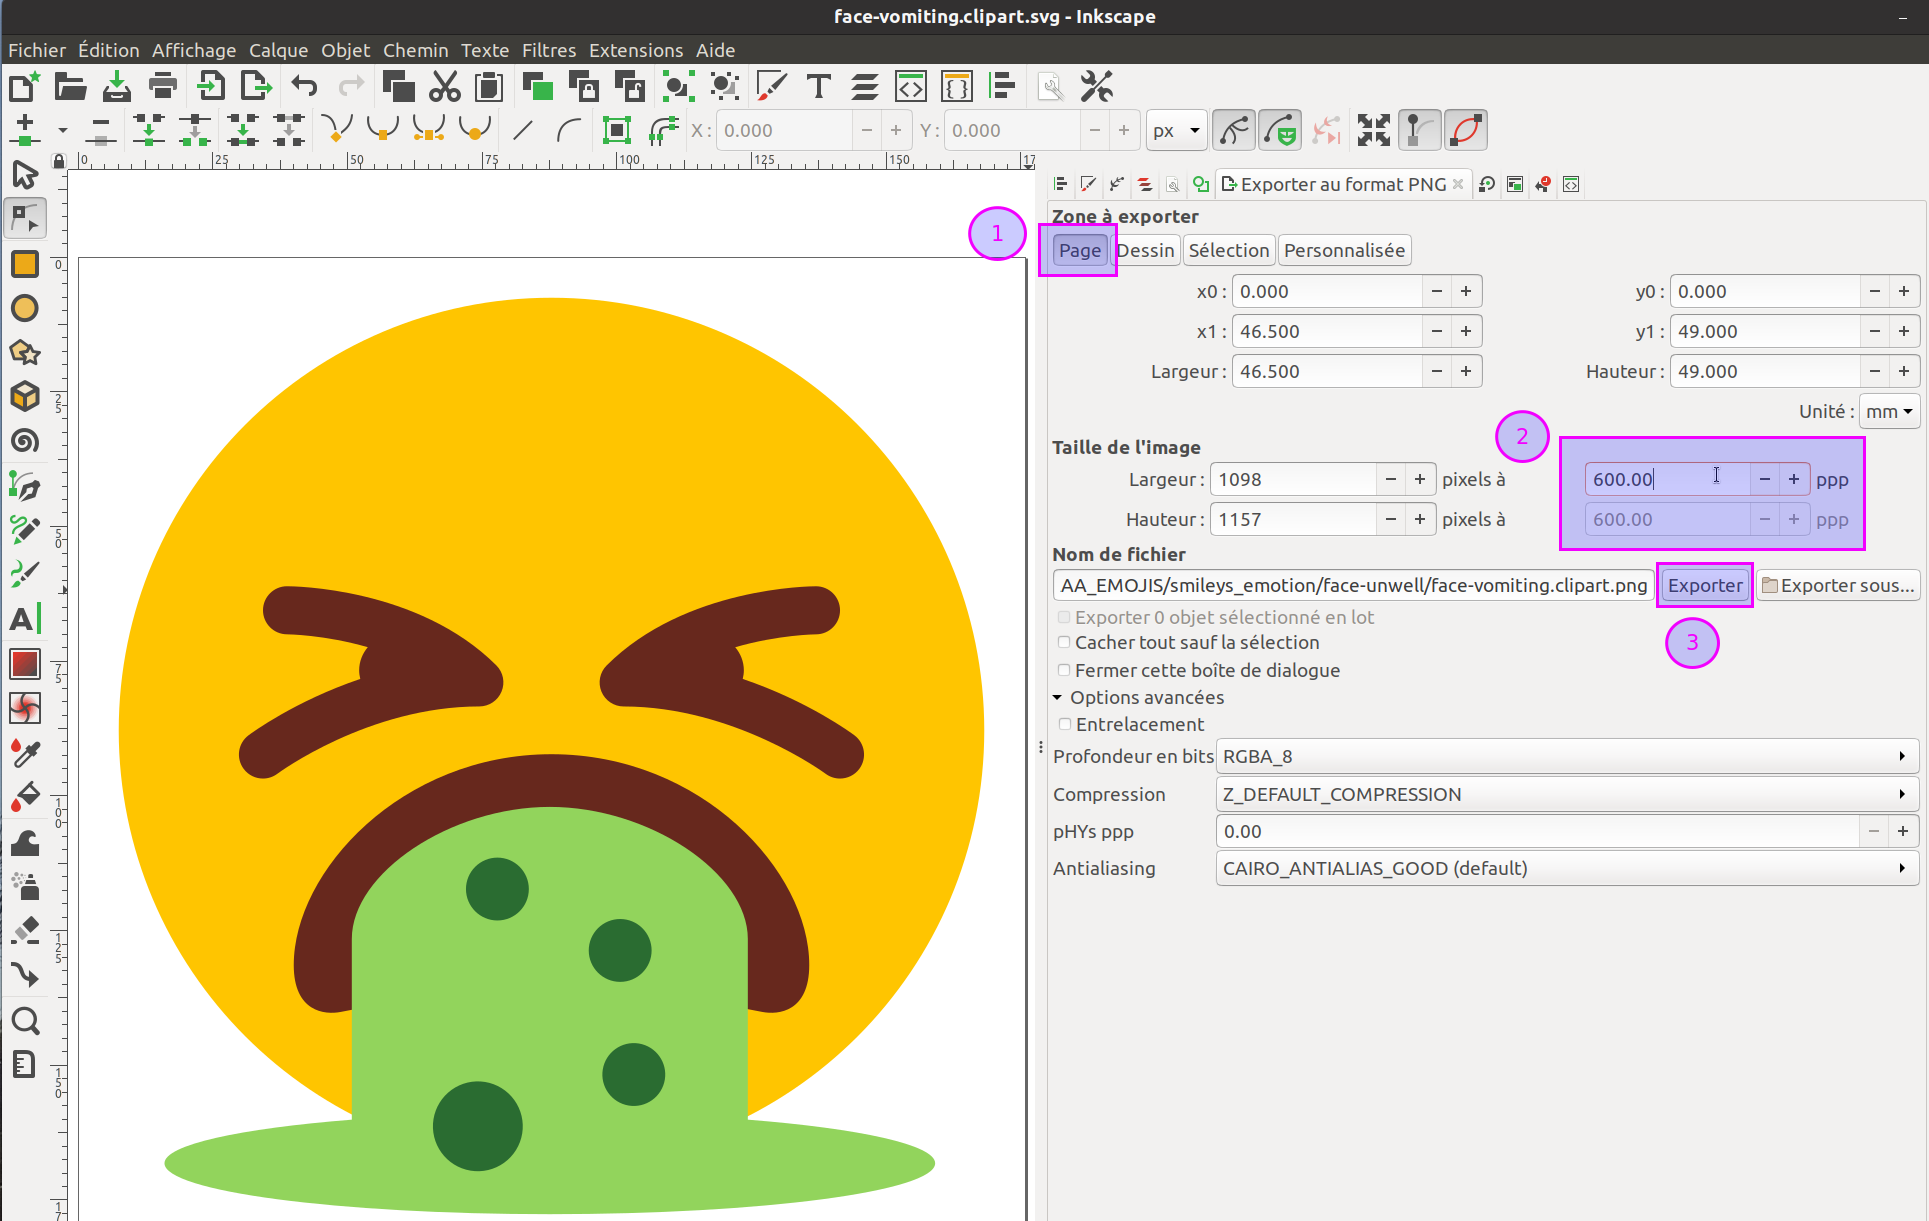
Basically, you just have to make sure that the image is sharp, a resolution of 600 DPI seems enough to us. In the image below we show the options we chose to export a 45mm smilie. To get the export panel to PNG:
File Menu -> Export to PNG- In panel: Select Page or Drawing
- In image size: Set 600 dpi
- Click on
Exportif you want to keep the proposed path otherwiseExport as...
The following figure shows the difference between a good and a bad raster (PNG) file. On the left the original SVG file (you have to click 2x on it to see the SVG), in the middle the PNG file in high resolution (600 DPI), on the right the PNG file with the default values (96 DPI).

Original SVG

PNG good resolution

PNG default resolution (bad)


It is imperative to work with a clean and high resolution image. A low resolution image contains soft edges which then result in unnecessary embroidery objects and the "object" itself is poorly digitized. Here is the result of digitizing a bad resolution image (exported at 96DPI). We see that the fuzzy and pixelated borders come from the embroidery objects (the satin lines in dark green), which is not desired. Besides, the other shapes are ugly. An image of a correct version can be found here.

Bad PNG file
Inaccurate PNG file scanning - poor quality!
Fichier Good quality PNG (high resolution export from a vector graphics program)
Good digitizing


Eliminate Gradients
When digitizing automatically, Hatch 2 offers color reduction. You can then ask for more or less colors, which translates to more or less objects. This operation does not generally give good results when dealing with gradients (for a working example, see below). In the image below, each gradient is digitized into 3 or 4 different objects which makes this 4.5cm design a little too complex to embroider and not necessarily pretty.
Therefore, it is advisable to eliminate gradients in the drawing software if possible, as we did for the example discussed in the next section. To eliminate a gradient in InkScape, we must
- show the
Object -> Fill and Strokepanel - Select the
Backgroundtab - Select a few or more objects of the same gradient color
- Click on the "flat" square
Here is a screenshot from InkScape that illustrates this procedure.

Auto digitize
Automatic digitizing works quite well for simple, clean drawings (see the previous section to see how to produce from a vector drawing which by definition is clean). Regarding auto digitizing, also read the official manual chapter, Auto-digitize embroidery . As a general rule, the semi-automatic digitization introduced below is preferred.
There are two options for automatic digitizing
Auto-digitize Instant Embroidery(deprecated)Auto-digitize Embroidery
The Auto-digitize Embroidery procedure detects the elements to be transformed into embroidery objects by color. If we decreased the number of colors, the close colors would be united in a single object. See example below.
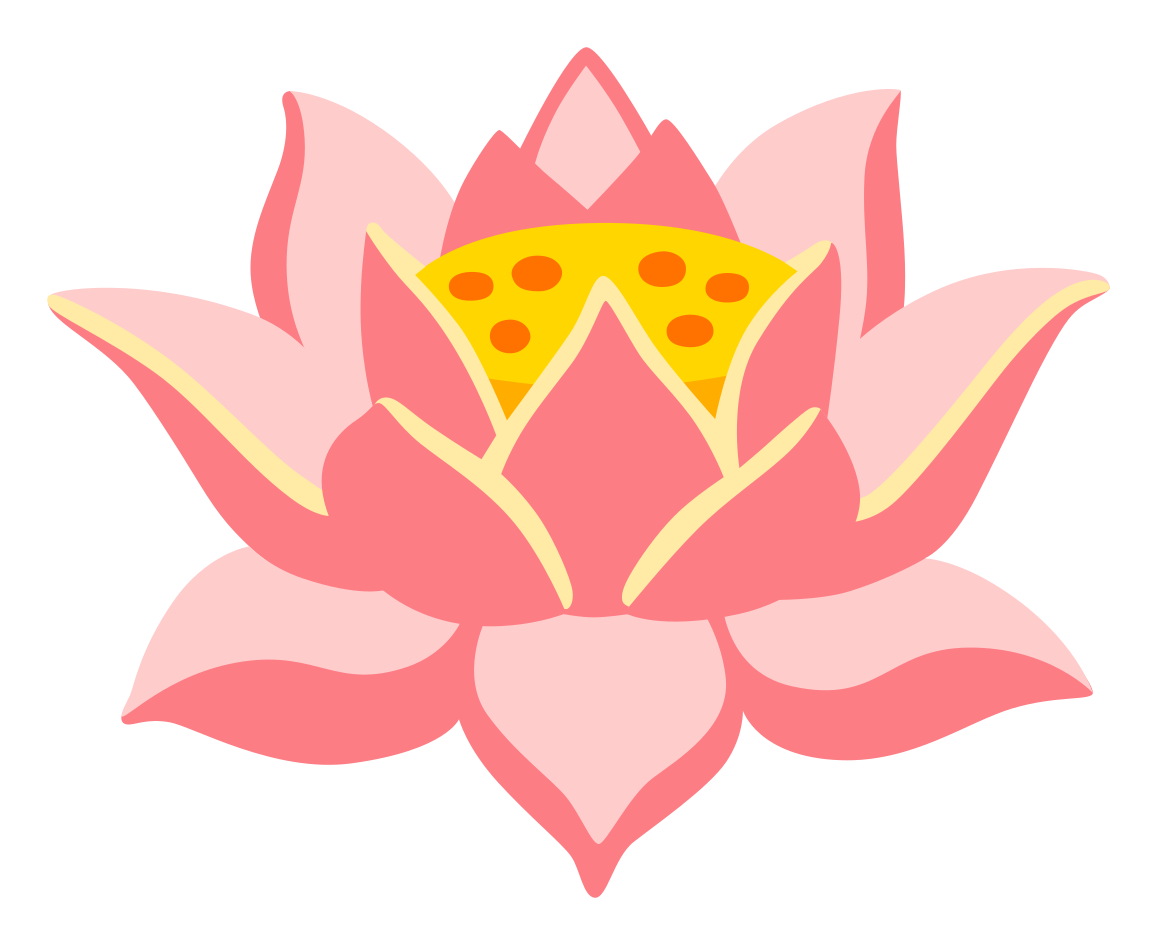
Here is an example that illustrates this process with a rather difficult pattern, the "Lotus" emoji from the Google Noto font. You can find the originals and the produced files here:
- lotus-noto.gradient.clipart.svg (vector drawing of origin)
- lotus-noto.clipart.svg (vector drawing without gradients)
- lotus-noto.clipart.png (*.PNG file exported in 600DPI)
- lotus-noto-hatch.EMB (Hatch design file)
- lotus-noto-hatch.PNG (simulation)
- lotus-noto-hatch.PES (machine embroidery file in PES format) .
Getting started with an auto-digitize
You must import an image and then start the procedure with the following steps. In Hatch 2:
- Create a new file: Click on
New - Insert raster image with
Artwork - Select picture
- Click on
Toolboxes -> Auto-digitize Embroidery....

Next, a number of choices must be made regarding color detection:
- How many colors to retain (color reduction below)
- Associate a color with a thread (optional, also below)
Finally, it is necessary to correct/adapt certain decisions made by the machine.
Color reduction
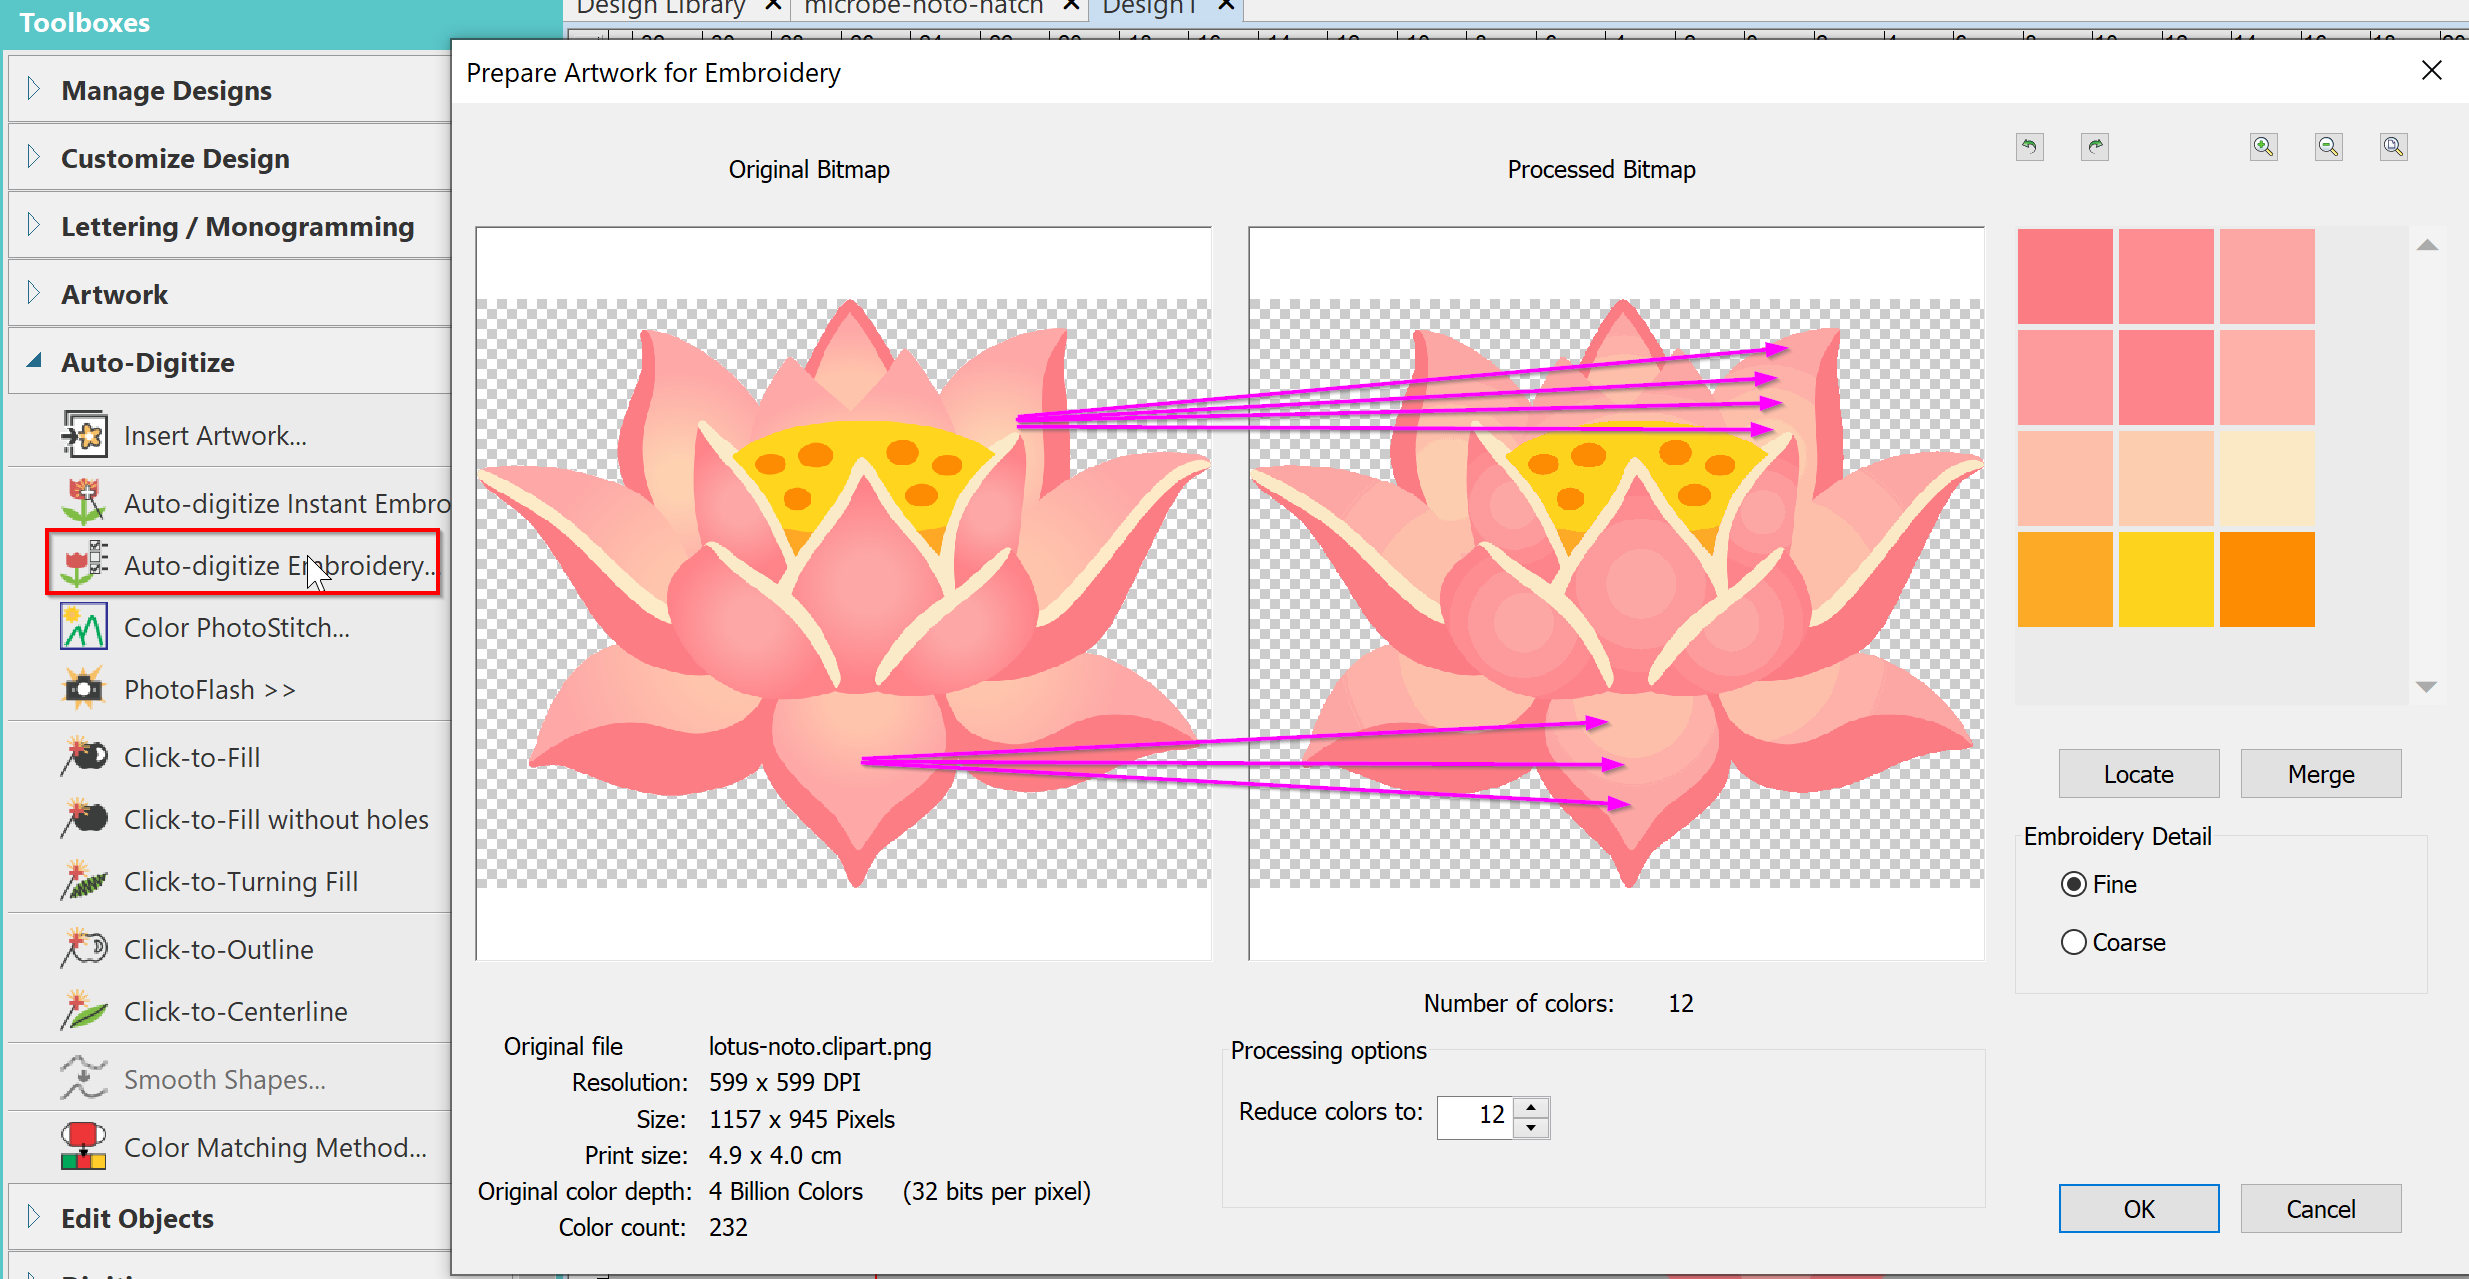
Once clicked on Auto-digitize Embroidery the following popup window will appear. On the left the imported image, on the right what Hatch proposes to simplify (nothing for clean and simple images).

Below is the result of a reduction to five colors.

Once OK is clicked, the next screen prompts for further decisions (optional), see image below "Auto digitize Options"
Auto digitize Options
First we define the allocation of colors, the sequences and the type of filling. If you are new to it, you can leave all the defaults and click OK.
Matching method:How to associate a color to a thread? In our In this case we chose the Gunold Poly 40 palette- Selection: You can change the digitizing sequence with the
move upandmove downarrows. So for example move what is "bottom" and supposed to be embroidered first upwards. Thelocatebutton displays the object associated with a color chosen from the list (therefore this makes it possible to find it). - The drop-down menus to the left of each color allow you to select the digitizing method:
Fillordetailor not to digitize (Omit) . We choose "Detail" for a thin object that must be digitized either as a line or as a satin line. "Detail" has no effect for larger areas.
Then we can define the digitization options, the stitching options
Details: Define how to digitize "details". You can choose between satin fillings, lines (straight stitches), or satin linesOutlines: Add outlines around embroidery objects (no, default)Border: Add a border, a sort of big frame.
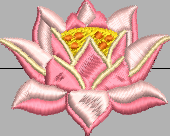
We left the flaws. Depending on the size of the object, the software decides whether to put a tatami filling or a satin. This can easily be corrected in the result, i.e. in the digitized embroidery objects. automatic]]Below, we show that the result is relatively mediocre, which is not surprising given the relative complexity of the object.
- The yellow filling in the middle is not very happy and we will replace it with a tatami without holes. The embroidery order is also to be reviewed. It should be embroidered before the light pink satins.
- There are two unnecessary objects, thin lines
- A petal has been digitized in tatami which is a break in style
- It would be necessary to change the direction of the satins for the pink circles, otherwise they get lost.
We will explain the configuration of embroidery objects in the article Hatch Embroidery 2 - configuration of embroidery objects and we leave you the possibility of (1) redoing the procedure described here from the file [http:/ /tecfa.unige.ch/guides/embroid/emoji/AAA_EMOJIS/animals_nature/plant-flower/lotus-noto.clipart.png lotus-noto.clipart.png] and (2) to correct defects once you have read more about parametrization.

Here is the adopted result simulation: lotus-noto-hatch.PNG (not tested ).

Semi-automatic digitizing
Semi-automatic digitizing (called "click-to-stitch") includes according to -stitch manual the following features "The Click-to-Stitch tools provide everything needed to automatically digitize shapes into bitmap images without using manual digitizing methods. These tools are useful for quickly creating embroidery objects from 'digitized images without having to manually digitize shapes.' (our translation)
There are five semi-automatic digitizing methods. Each consists of (1) choosing the method and (2) clicking on a color area in a raster image:
- Auto-Digitize >
Click-to-Fill- Creates a tatami fill of an area - Auto-Digitize >
Click-to-Fill without Holes - Creates a tatami fill without holes. Useful for example if you want to embroider small objects like an eye on a face. - Auto-Digitize >
Click-to-Turning Fill- Creates satin from columnar shapes - Auto-Digitize >
Click-to-Outline- Creates an outline with a straight stitch. Also used to add borders to a fill. - Auto-Digitize >
Click-to-Centerline- Creates an outline from a drawing with lines.
The first time we click on the drawing, the software asks us to confirm the number of colors, as in the automatic digitizing procedure described above.
To follow what you are digitizing, we recommend displaying the sequence panel with Window -> Dockers -> Sequence (SHIFT-L). It is particularly important not to digitize the same object twice or more times because embroidery in multiple layers will be too hard and may break the needle. In "auto-digitize" mode, we very quickly created objects that we did not want. They can just as easily be deleted with the DEL key.
Example of maple leaf emoji semi-automatic digitizing
Here is an example, the "maple leaf" emoji from the Google Noto font. The example shows cHow:
- digitize a wide surface without holes,
- digitize small columns on top,
- add a straight stitch edge,
We use and produce the following files:
- maple-leaf-noto.clipart.svg (vector clipart prepared)
- maple-leaf-noto.clipart.png (imported clipart)
- maple-leaf-hatch.EMB (Hatch/Wilcom design file)
- maple-leaf-hatch.PES (Brother machine file)
- maple-leaf-hatch.PNG (simulation)
The image was prepared in Inkscape. The following changes have been made:
- Removed gradient for leaf
- Removed the border for the sheet as it wasn't very precise and Hatch can be asked to add a better drawn border.
The drawing to be imported contains two colors, so we will accept Hatch's proposal (not shown) here.
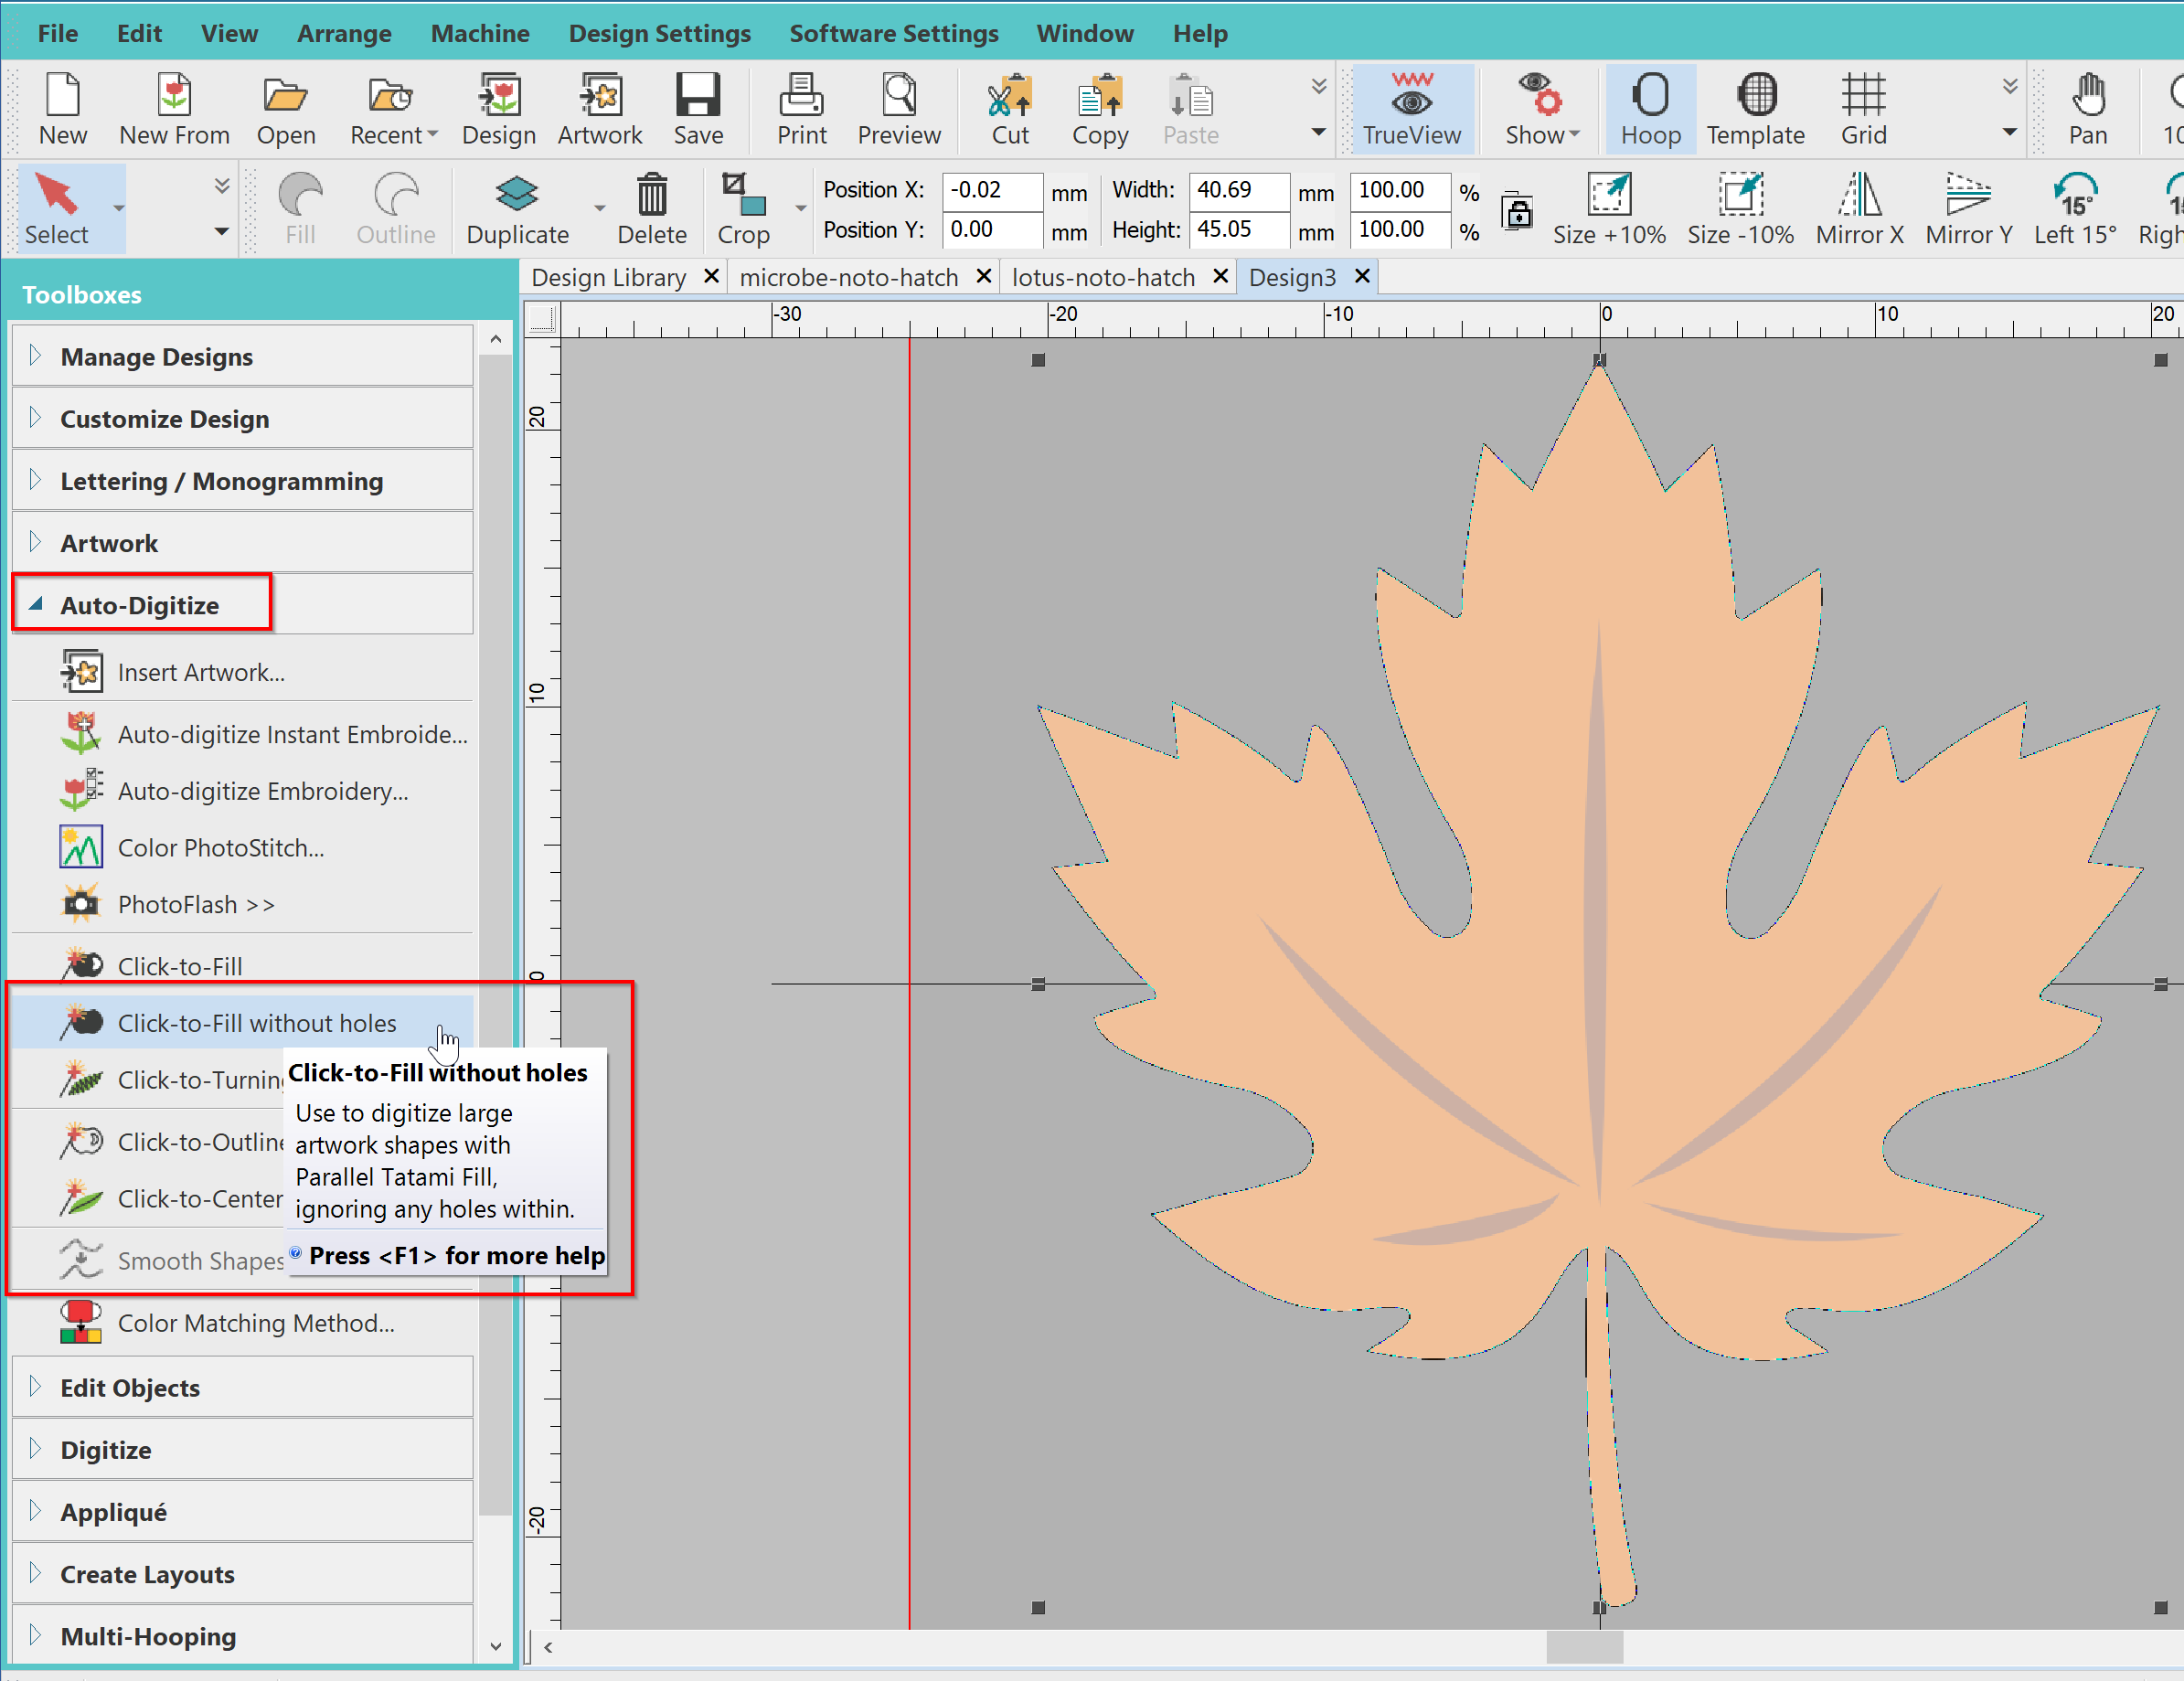
We will digitize the sheet with a tatami without holes, because a continuous surface looks nicer in our opinion. So we first choose the Click-to-Fill-without holes tool, then we click on the sheet.
Toolbox -> Auto-digitze -> Click-to-Fill-without holes- Reminder: When using the tool for the first time, Hatch will ask us for the number of colors to use (identical step for the automatic digitization described above)
- Then you can click on objects. Each click creates an embroidery object!
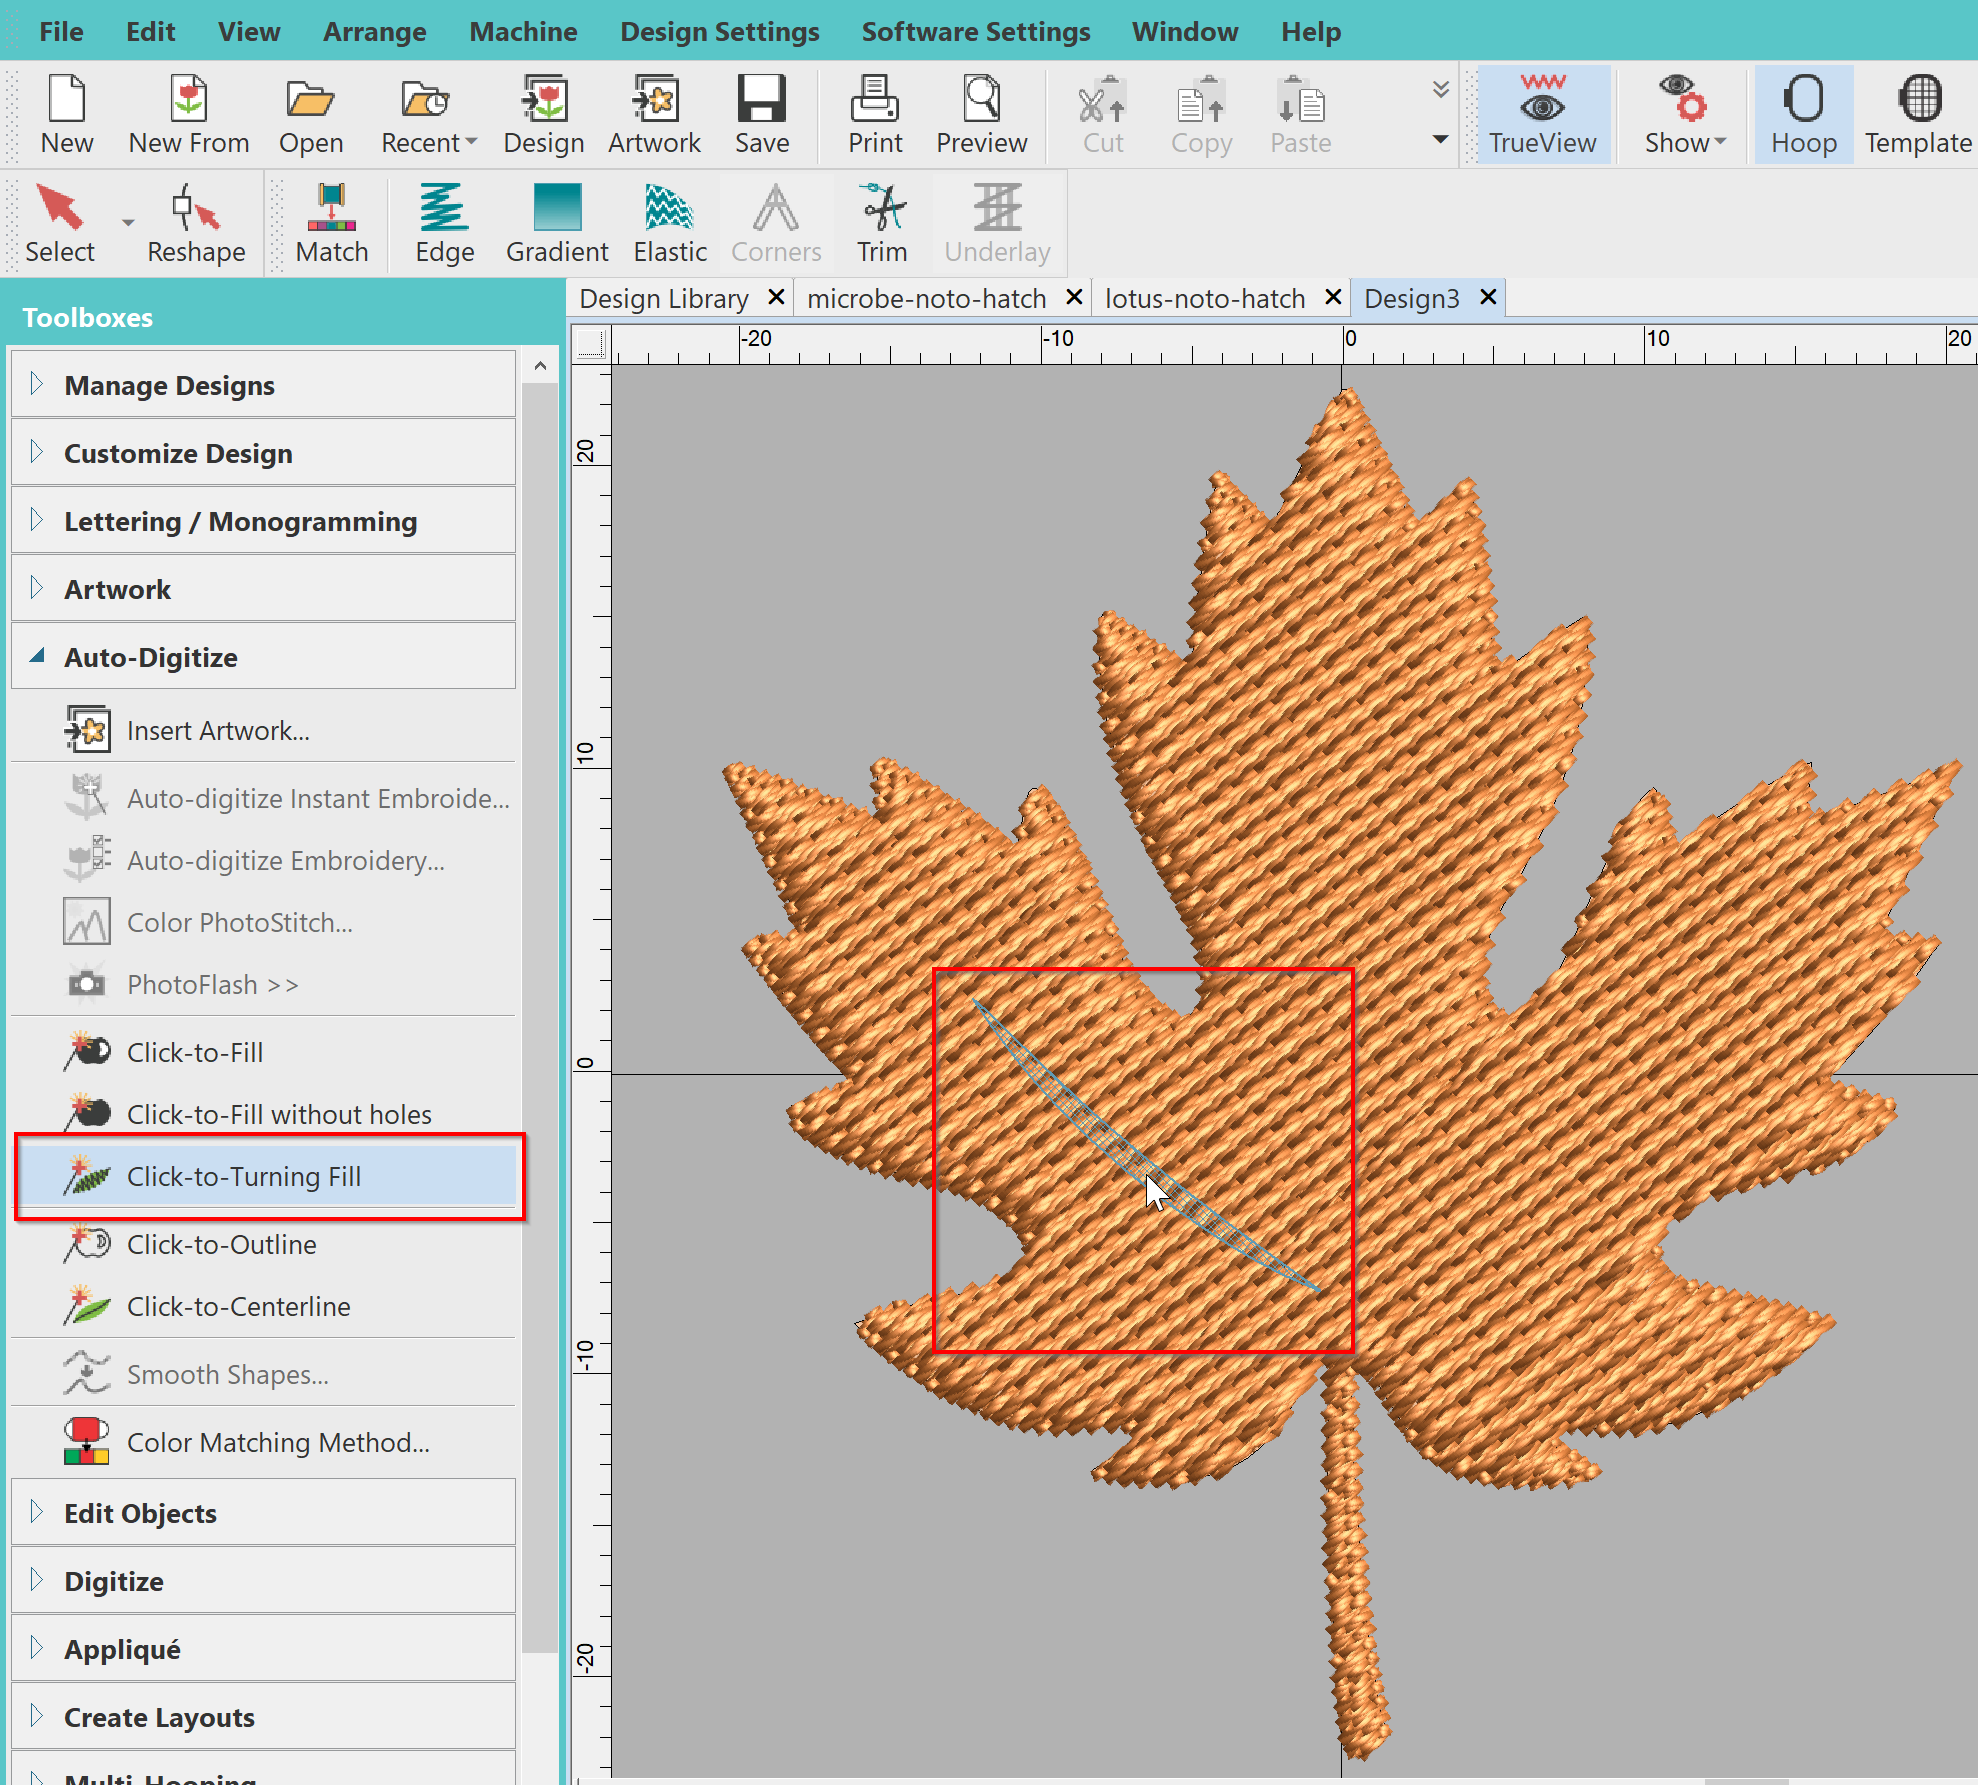
The nerves of the sheet will be digitized in satins over the tatami.
Toolbox -> Auto-digitize -> Click-to-Turning Fill- Click on each nerve of the leaf (five in all). By dragging the mouse, the areas in question will appear one by one like the first in the image below.
It doesn't seem to be possible to add a simple outer outline (click-to-outline also adds an outline around the nerves). The software also doesn't seem to have a feature to add a border to an object. So:
- We digitize the sheet a second time with an outline, using
Toolbox -> Auto-digitze -> Click-to-Outline - We delete the borders created around the nerves (it's quickly done by selecting them in the sequence panel).
- We change the color of the outline (click on the 17 in the palette)

Alternatively, one could have created a satin border with the following method:
- Duplicate the sheet (
Duplicatein the menu bar) - Click on
Outlinein the menu bar and set the width.
But, here is the simulated result of the solution sketched in this section (so a border with a triple point).

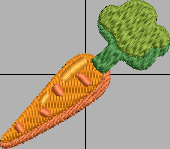
Example of semi-automatic carrot emoji digitization
This simple example shows how to digitize a carrot (Noto font, Android 12) in the correct order and how to re-set the result (read Hatch Embroidery 2 - setting up embroidery objects for more details on this last topic). We have the following files:
- carrot-noto12.clipart.svg
- carrot-noto12.clipart.png
- carrot-noto12-hatch.EMB
- carrot-noto12-hatch.PES
- carrot-noto12-hatch.PNG
Before starting, we check the fabric
Design Settings -> Auto Fabric ...
The following image shows the stitching order with numbers pasted on it:
- Zones 1,2 and 4 are digitized in tatami:
Click-Fill - Zone 4 (orange) in tatami without holes:
Click-to-Fill-without-Holes - Satin remains:
Click-to-Turning-Fill

The results seem to be almost good. To make you aware of the notion of parameterization, we slightly modify the result. We're just going to turn the orange tatami a little to prevent the threads of the two yellow satins from getting lost. So we go:
- Select the orange object
- Show the
Object Propertiestool if you haven't already:Toolbox -> Edit Objects -> Object Properties - Select the
stitchingtab - In
Stitch Angle, put 90
We see that the direction line (squares in dark orange) goes from top to bottom (90 degrees)

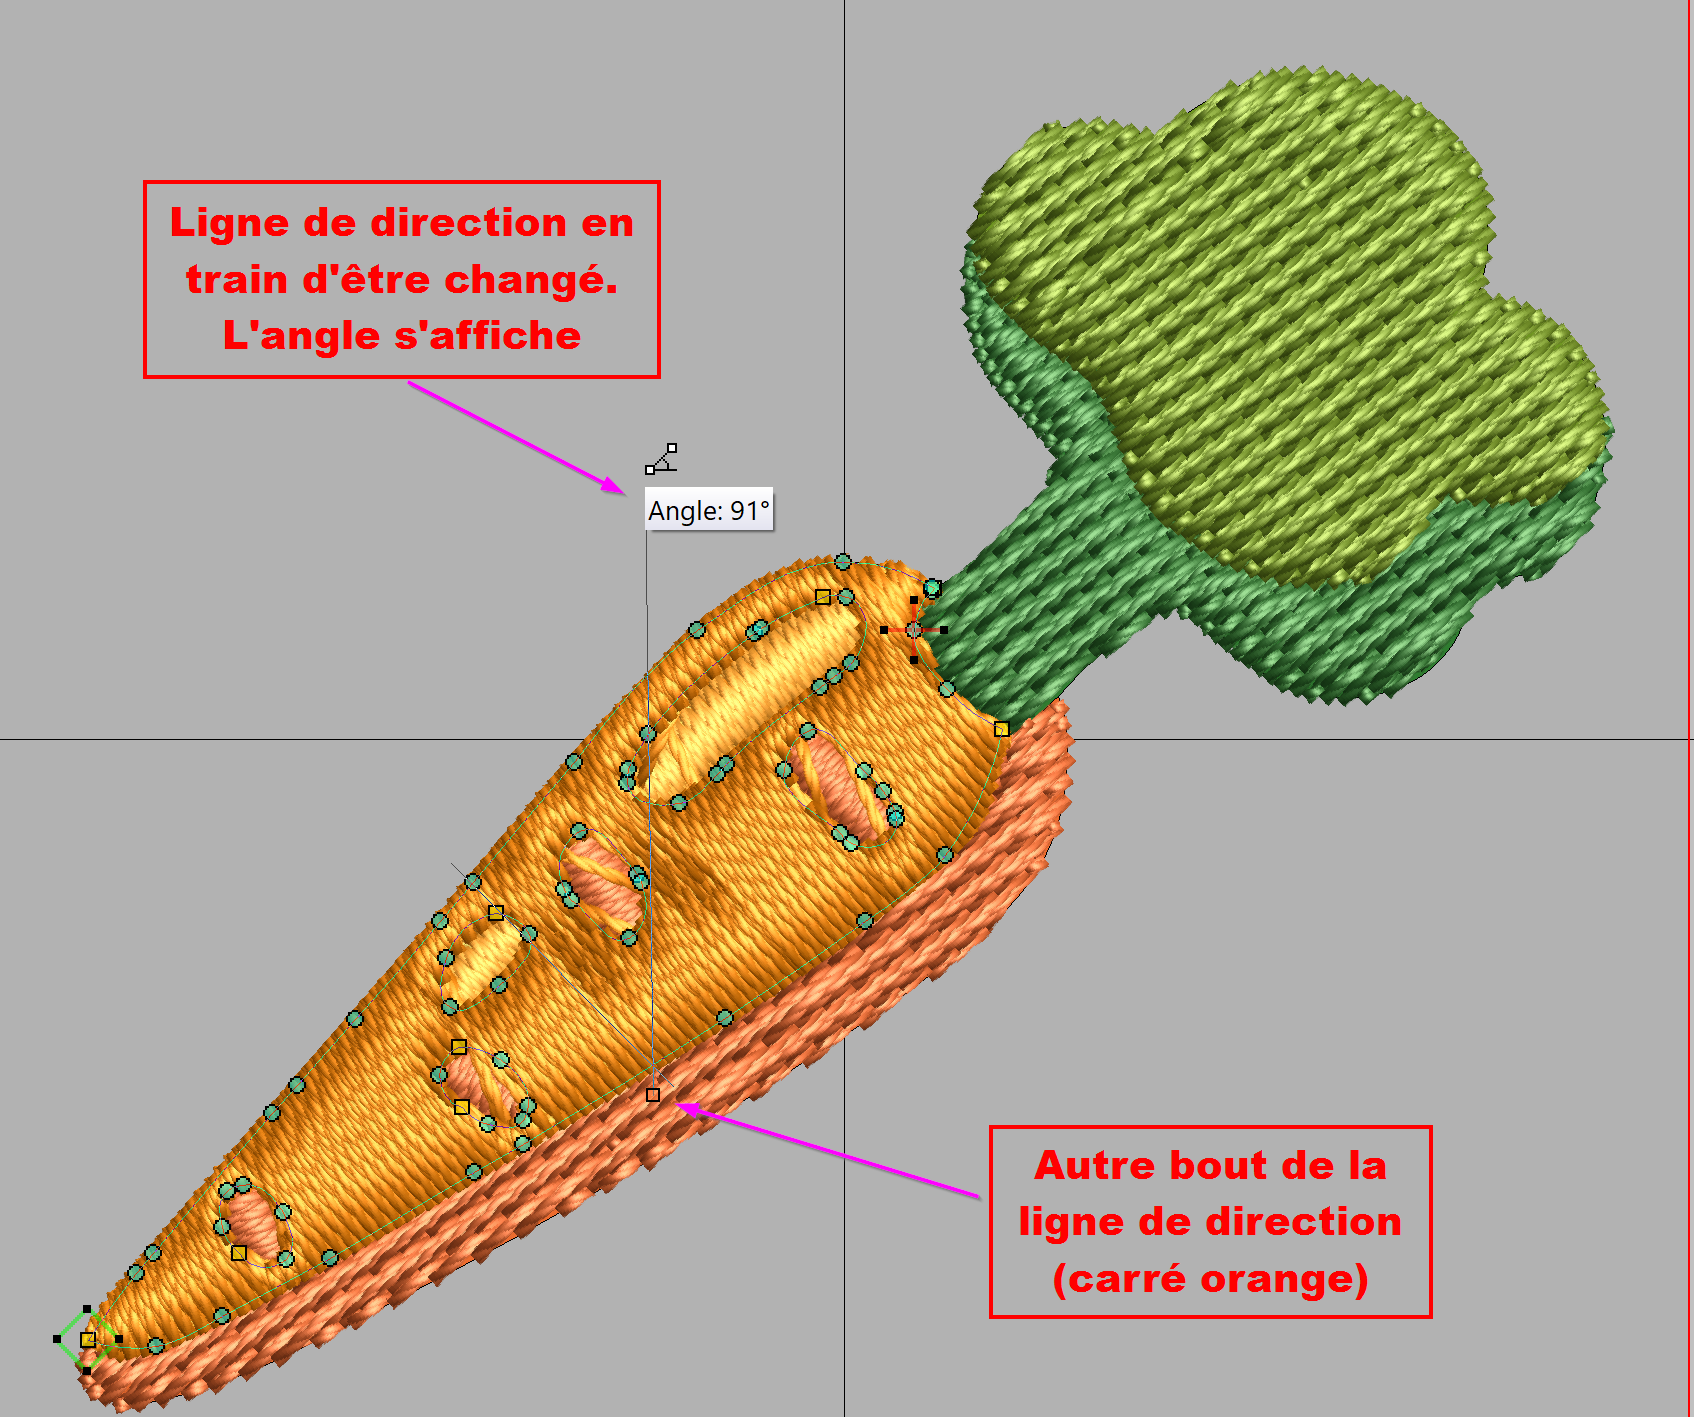
Alternative: If we had wanted a smoother carrot, we could have made a filling with a satin stitch. In this case it is even more important that the satin lines do not go in the same direction. Here we show how to change the direction of the satin by dragging the direction line.
- Click on
Reshape - Identify the line of direction (an orange line with two orange squares at the end). To change the angle, position the mouse over one of the squares until the "angle" cursor appears, then drag.
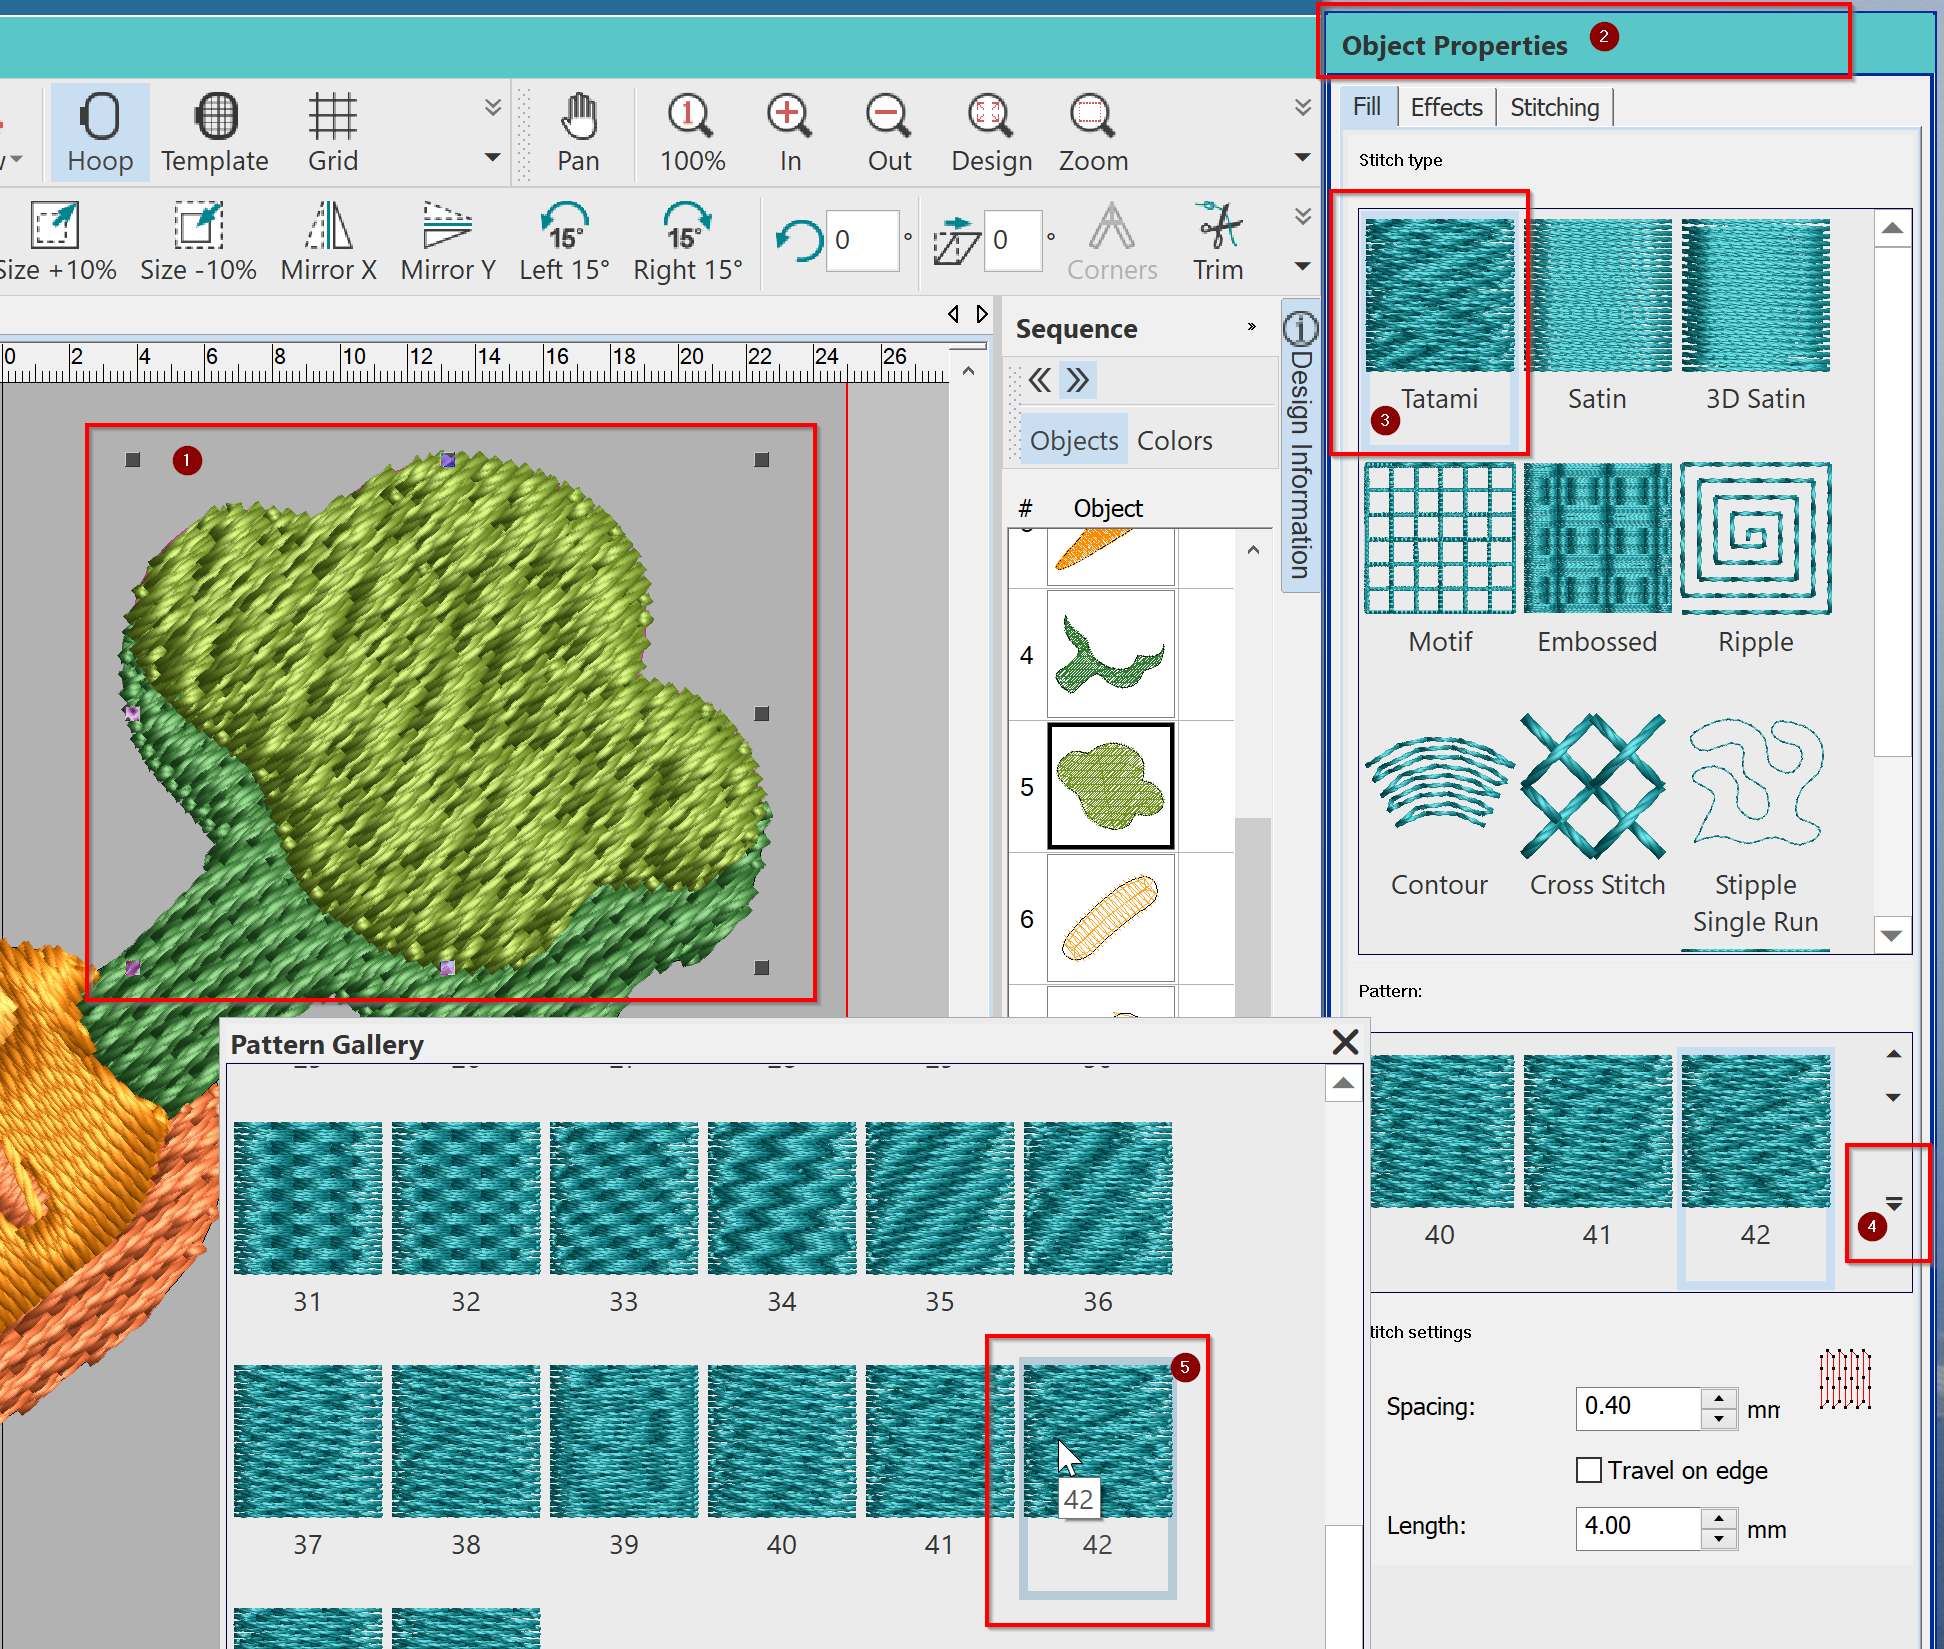
Finally, we are going to change the filling for the green and make it a little more irregular. You must first choose the select tool at the top left, click on the object whose texture you want to change (pattern). You must display the Object Properties tool if it is not already done: Either with Toolbox -> Edit Objects -> Object Properties, or with Windows - > Dockers -> Object Properties
Here is a simulation of the result (orange in tatami)

Example of semi-automatic digitization and adaptation of the drawing of the grass emoji
This example is intended to show that it is useful to re-model a drawing before exporting it to PNG for import into Hatch. First three images: the original Noto Police "herb" emoji (Android 12). The following three images: a version with the following modifications: Separation of the leaf stems and color change, re-drawing of the bottom of the leaves, change of the color of the stem. In this article we do not explain how to use a drawing tool. In summary, a matrix file is produced where the elements to be embroidered have a distinct color.
Files used and produced:
- herb-noto12.clipart.ori.svg Original slightly retouched: Source = Noto emoji font (Android 12)
- herb-noto12.clipart.ori.png PNG of the original
- herb-noto12.clipart.svg Original retouched
- herb-noto12.clipart.png Retouched original exported in PNG 600 DPI
- herb-noto12-hatch.EMB (Wilcom/Hatch design file)
- herb-noto12-hatch.PES (embroiderable machine file)
- herb-noto12-hatch.png (Embroidery file simulation)
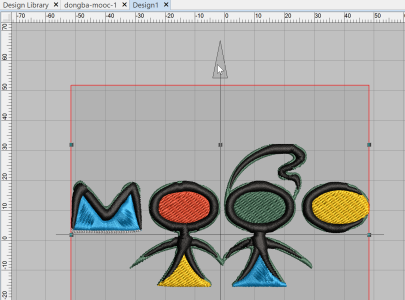
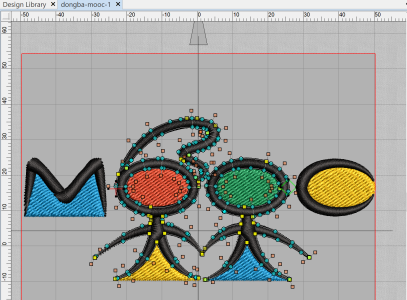
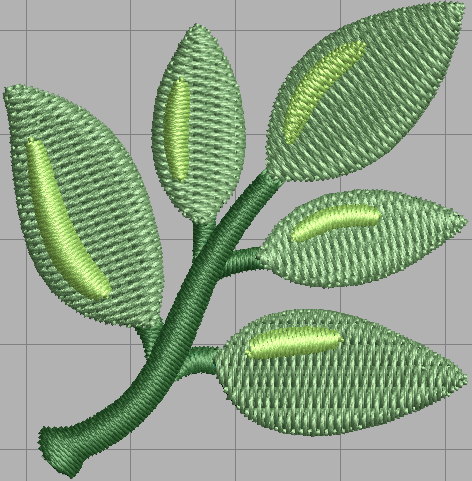
Here is a gallery of images that shows the difference between digitizing a drawing directly and digitizing a modified drawing which gives a more interesting result. Creating tatami rods is never a good decision, unless you are into post-modern....

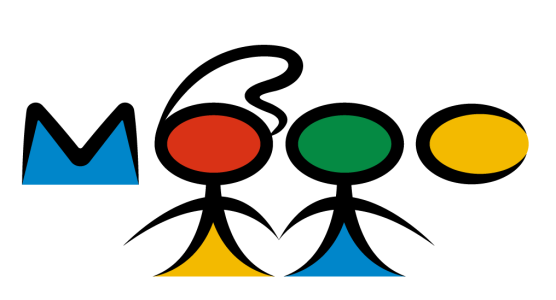
Original vector drawing (click 2x to see svg)

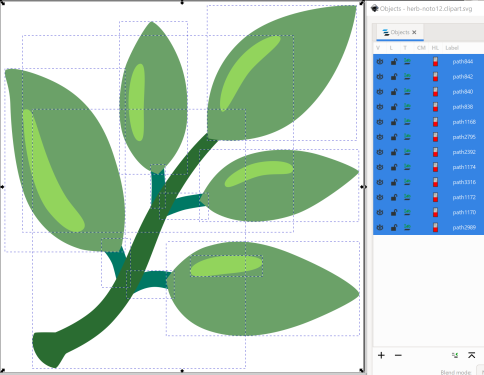
Screenshot that displays objects from the original version
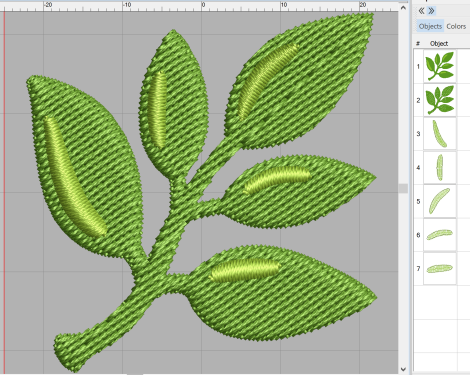
Screenshot of the scan of the original version (tatami rods)

Adapted vector drawing (click 2x to see the svg)
Screenshot that displays the objects of the adapted version
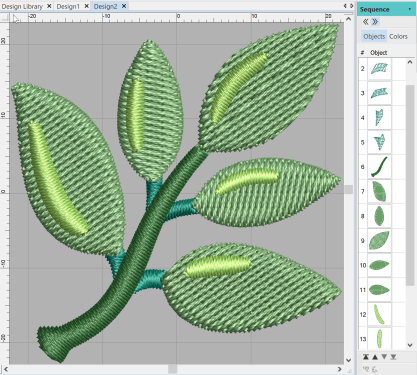
Screenshot of the adapted version scan (satin rods)


digitizing is simple. For the original version we use:
- first
Clickk-to-Fill without holesfor the set of leaves plus stems (a single object) - then,
Click-to-Turning Fillfor "satin highlights".
For the redesigned version (with well separated rods) we proceed as follows:
- First we digitize the rods with
Click-to-Turning Fill - Then
Click-to-Fill without holesfor the different sheets Click-to-Turning Fillfor "satin highlights".
To improve the digital digitization, it would be necessary to harmonize the colors of the rods and possibly re-parameterize the filling.
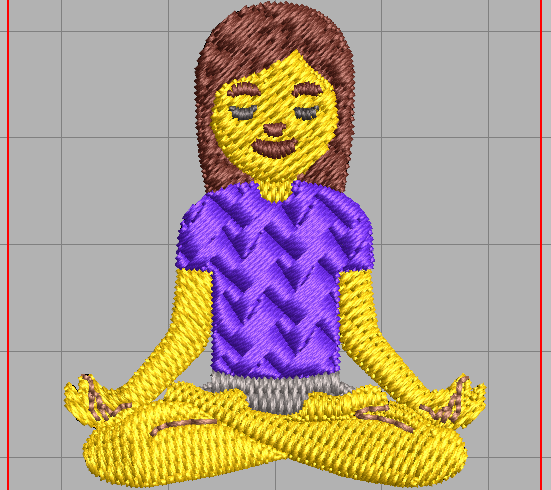
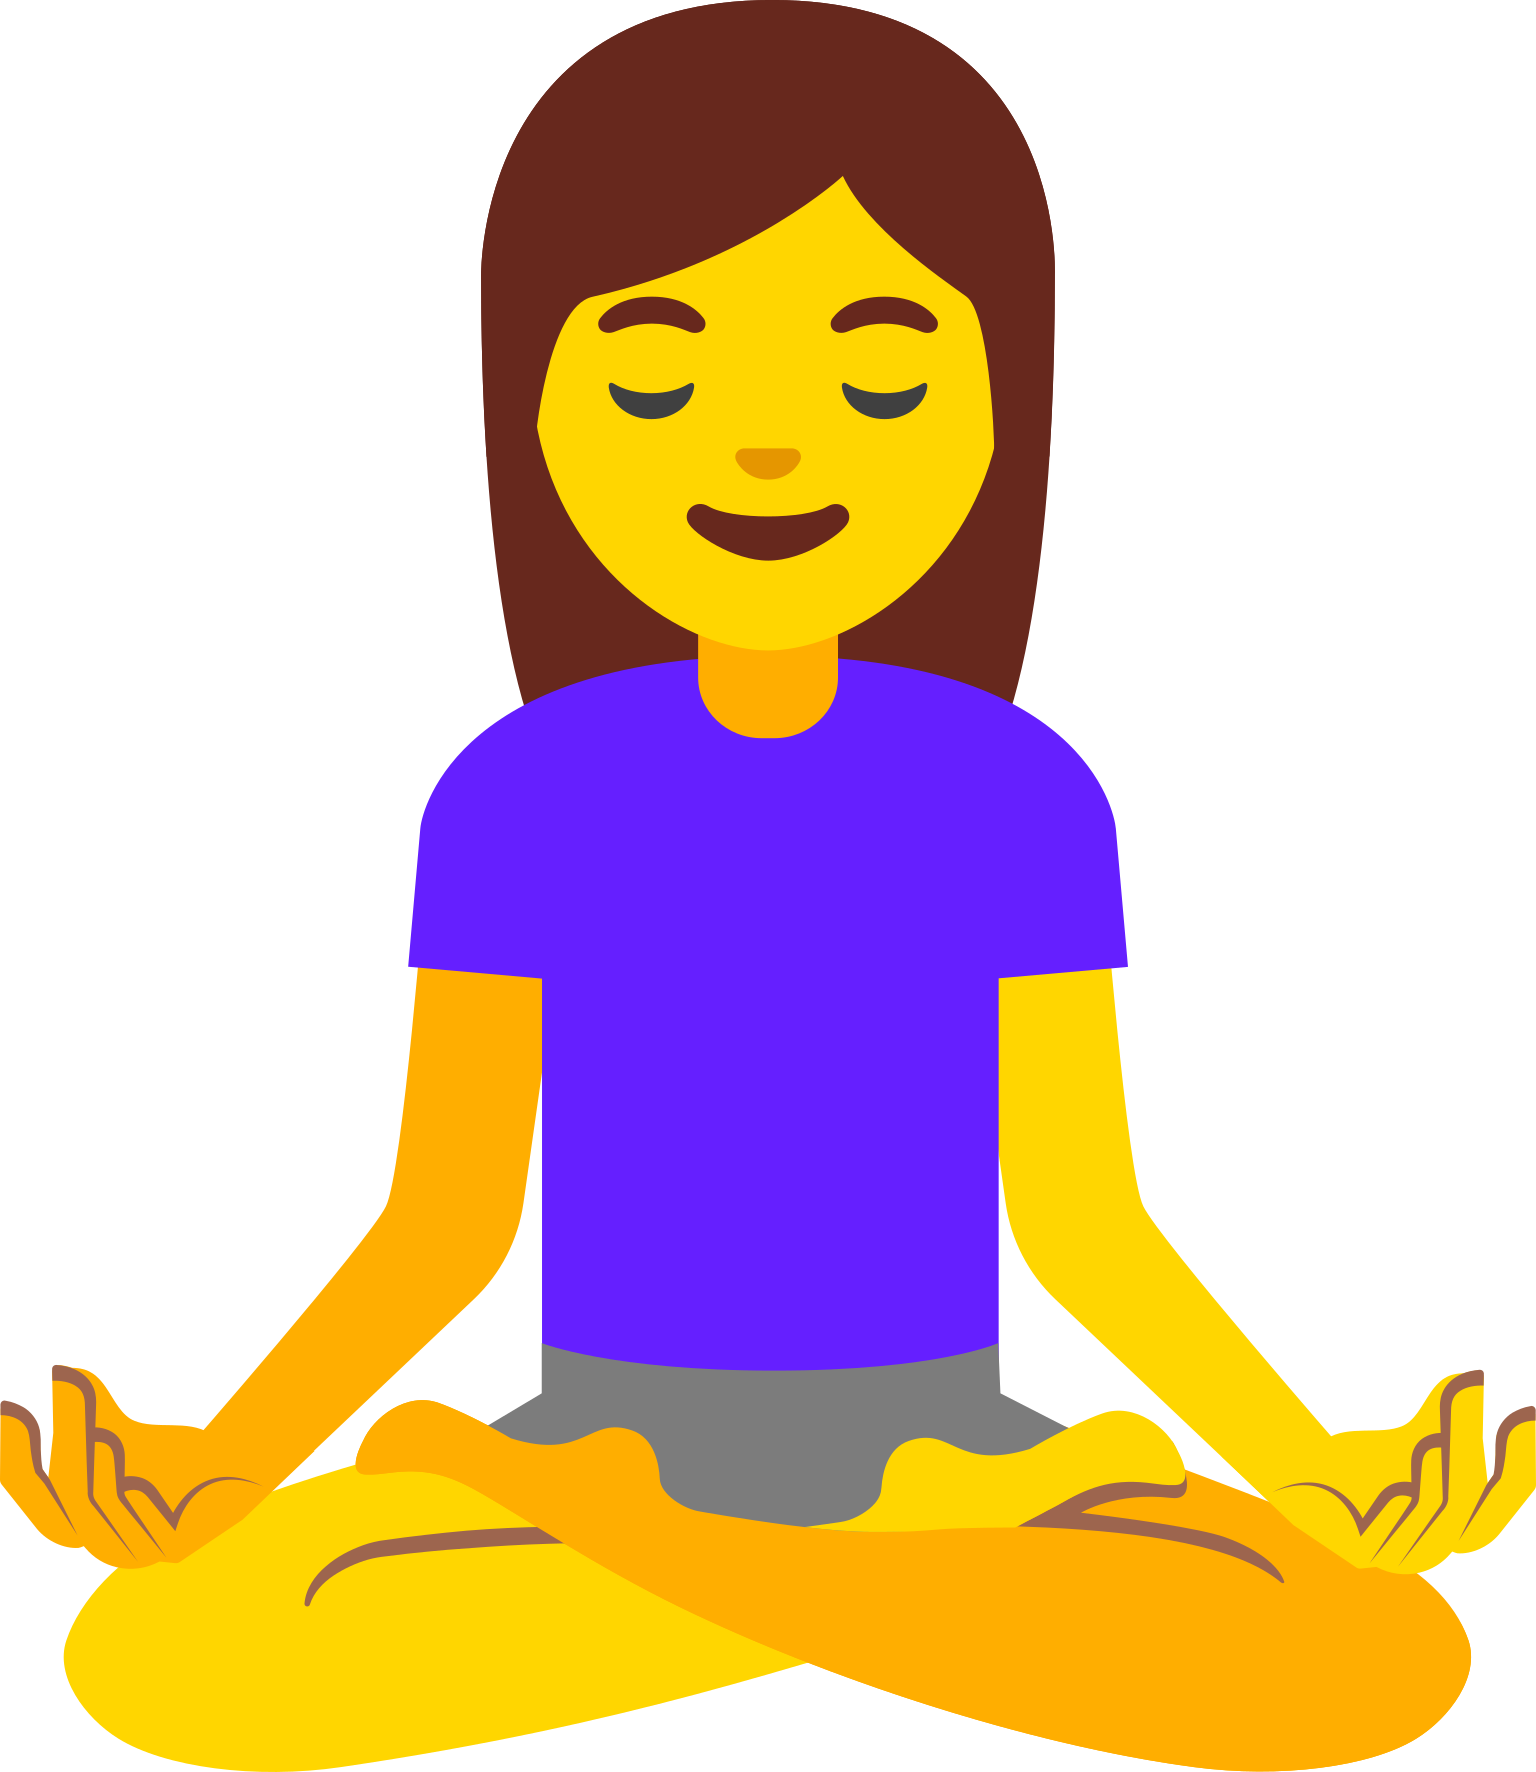
Example of semi-automatic lotus position emoji digitization
The following example once again demonstrates the principle of recoloring an original so that Hatch can correctly detect objects. In a software that allows to vectorize vector this would not be the case.
Files:
- woman-in-lotus-position-noto.ori .clipart.svg
- woman-in-lotus-position-noto.clipart .svg
- woman-in-lotus-position-noto.clipart .png
- woman-in-lotus-position-noto-hatch .EMB
- woman-in-lotus-position-noto-hatch .PES
- woman-in-lotus-position-noto-hatch .PNG
On the left the original SVG, on the right the cleaned SVG (no gradients, use of two different colors to clearly distinguish the arms and hands). Once digitized, you can put everything in the same color, provided you play with the embroidery angles. We set the PNG exported from InkScape to 1000dpi because of the detail. That said, modeling the hands will remain difficult for this size (4.5cm high). It would be necessary to test the pattern and probably redo the hands! We could also consider putting an outline around the limbs.

Original SVG Image

Cleaned up SVG image


digitize summary:
- We first digitized the beige "shadows" with "center-lines" (at the end we moved them), because otherwise they are difficult to grasp. In our opinion the result is not guaranteed and it may be necessary to remove them
- We digitize the tatami shorts
- Then the hair
- We digitize the hands, but in tatami without holes
- Then, everything that is yellow in tatami
- The tatami sweater
- We move the rows to the bottom of the stack
- We change the angle for each leg
- We put all the yolks to the same color.
- We vary a little the "patterns" of the tatami (according to your tastes).
Simulation of this digitization, probably to be redone:
Example of semi-automatic digitization with color fusion
Instead of just reducing the colors, it is often useful to merge them. This eliminates small adjacent and superimposed details.
Files:
- http://tecfa.unige.ch/guides/embroid/emoji/AAA_EMOJIS/people_body/person-sport/man-biking-noto.clipart.svg
- http://tecfa.unige.ch/guides/embroid/emoji/AAA_EMOJIS/z_variations_combis/live-to-bike-patch-62mm-border-wt12-writing-wt60-hatch.EMB
Once launched the semi-automatic digitizing with "click....":
- Choose two colors with CTRL-select
- Click on merge
In the following example, the cyclist's hair is eliminated. Obviously this only works if the hair has a single color. So as not to merge anything.
- Check the vector original if possible
- Choose color in Hatch, then check with


The bike is based on Noto's "man-biking-medium-light-skin-tone" emoji design.
Here is the result of the semi-automatic digitization: Filling without holes (face), filling with holes (clothes), rotating object (part of the bicycle and limbs of the cyclist) and center line (straps)
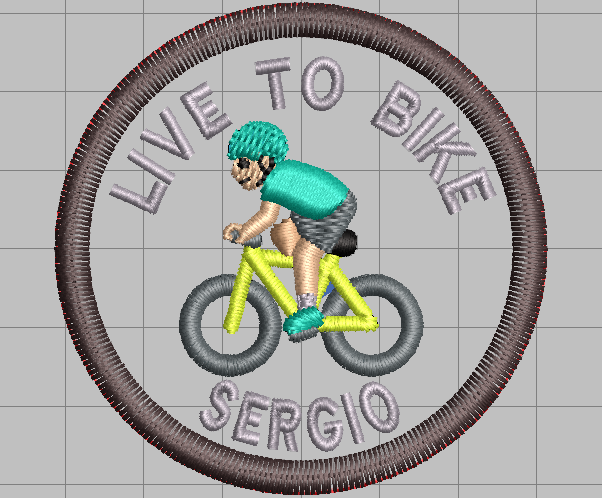
Embroidery of a generic version. The border wasé embroidered with decora 12 thread (and a 100/16 topstitch needle). The text with a 60 thread and a 60 needle. EMB and PES files "live-to-bike-patch-62mm...." are available in /AAA_EMOJIS/z_variations_combis/ this folder

The result of the first version embroidered correctly, but we forgot to take a picture...
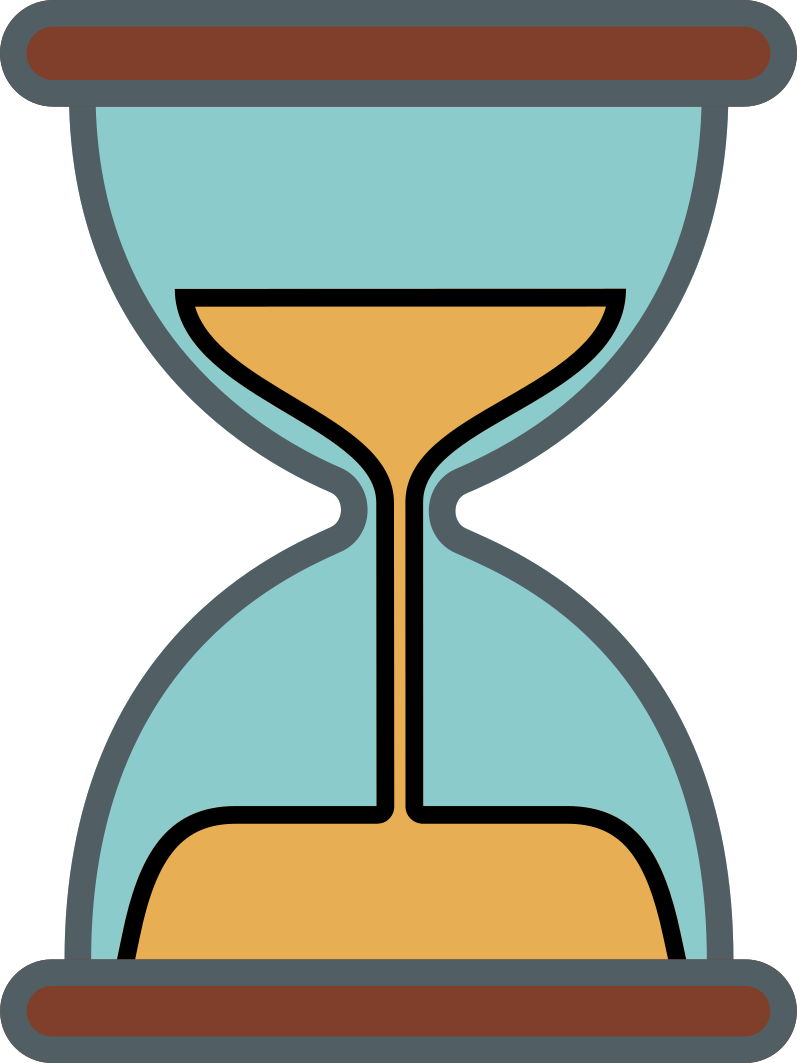
Example of semi-automatic digitizing of the hourglass not done emoji with lines
We'll see how to digitize an object with lines using the Noto (Android 8) "hourglass not done" emoji.
Files:
- hourglass-not-done-noto.ori.clipart.svg (Original drawing not used)
- hourglass-not-done-noto.clipart.svg (original drawing without gradients or transparencies)
- hourglass-not-done-noto.clipart.png (file at import into Hatch)
- hourglass-not-done-noto-hatch.EMB (file design)
- hourglass-not-done-noto-hatch.PES (machine file in PES format)
- hourglass-not-done-noto-hatch.PNG (simulation)
First, we transform the original drawing in InkScape:
- We remove the transparency of the contour lines (they will become black)
- We put the wide outlines in dark gray (instead of black) and we keep the outline around the sand in black (it is important to keep two colors separate, to then be able to handle two different embroidery objects)
- We remove the gradients from the surfaces
- We exchange the colors for those of our mini-palette of Gunold threads
As a result we will have a drawing with 5 colors. We could have digitized the object without these transformations, but we always prefer to start with a very clean design that roughly corresponds to what we want to embroider. You can still manipulate embroidery objects, for example cutting an object in half, but the manipulation is simpler and more precise in drawing software.
digitize procedure:
- We first proceed to a semi-automatic digitization of the two tatami surfaces.
- The "wooden" top and bottom are digitized in satin stitches because they are wide enough.
- The gray outline and the black outline are digitized in contour line with
Click-to-Centerline. We could have digitizened the gray outline in satin, but it would have been a little too thin and therefore would have pulled the fabric.
Remember that a digitize takes place each time you click. It is therefore necessary to check the objects created in the sequence panel, which can be displayed with Windows -> Dockers ->Sequence. This also means selecting the arrow tool (top left) as soon as you've finished digitizing. This advice is valid for any drawing tool....
Finally, we use a "triple run" for black and a "backstitch" for gray. To change a parameter, you must display the "Object Properties" panel, for example with Design Settings -> Object Properties .... . Then, you have to select the object, either by clicking on it with the arrow found at the top left, or by clicking on the object in the sequence panel.

These options will be explained in more detail in the section les_objets de type outline in the article on parameterization.
Note that in a drawing without outlines one could have used "click-to-outline", because this method adds outline lines to all edges. In other words, removing the contour lines in the drawing software and just keeping the blue, sand and wood would have been another option for preparation.
The image above also shows a bug in the digitizing algorithm: The top left curve is badly done. This can be fixed by editing the object (read Hatch Embroidery 2 - editing embroidery objects). We replaced the multiple corner points with two curve points and it worked out. Like what automatic digitizing does not always work as we want....
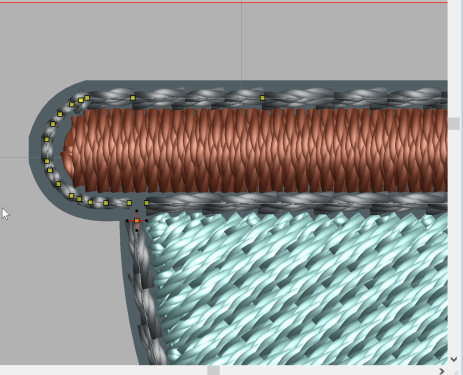
Object incorrectly digitized (too many corner points, bug in the algorithm)
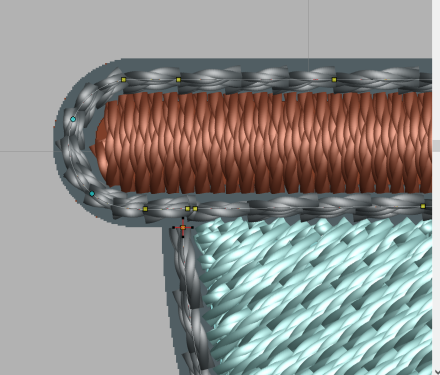
Edited object (less corner points)


Discussion: For some reason that we do not understand it is impossible to switch from a straight stitch to a satin in the interface in this precise pattern. In the other direction (satin column fill to outline via a "center line" method) it doesn't work either. You have to re-digitize the outline. So a weakness of Hatch compared to Stitch Era for example.
Tips
We first recall that it is imperative to work with high resolution and clean graphics. Otherwise it is better to start digitizing manually.
Color Management
First, we recommend working with a color palette that represents the threads you have. Thanks to InkStitch we can import the most important palettes into Inkscape, our favorite drawing software. Next, we use a Gunold Poly 40 mini-palette that we make available here for InkScape/InkStitch users: %20No.gpl InkStitch Emoji Gunold No.gpl.
In Hatch, at the start of each automatic or semi-automatic digitizing dialog, color adjustments can be made.
The color matching method allows you to select the method to identify a thread for a color. It is possible to change the color of the digitized object with the thread palette (adjustable to your brand and type)
For Outline and Centerline options, the manual advised to disable "match-to-palette" and manually choose a dark color.
Other tips
Attention (once again): You must check that the sequence of embroidery objects does not contain duplicates. Double clicking on an object creates two objects to border.....